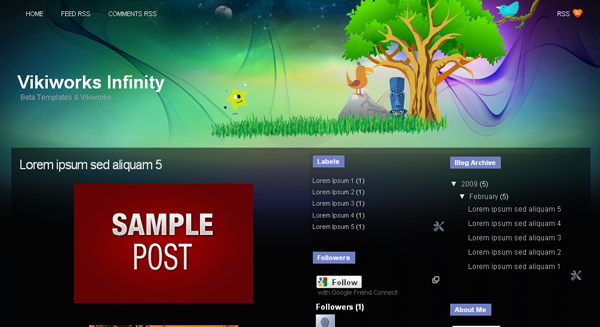
Tuesday, June 30, 2009

Add More Widgets Under Header


In default Blogger templates, you can't add another widget under Header widget. A lot of people would like to add Adsense, a search box, a translator or a horizontal menu under header, so you need to change some default code to do that.

This is a typical view of Layout | Page Elements section.


How to Add More Widgets Under Header

Steps


To create Add a Gadget option under Header widget, follow these steps:

1- Go to Layout | Edit HTML.

2- Find the following code:


<div id='header-wrapper'>
<b:section class='header' id='header' maxwidgets='1' showaddelement='no'>
<b:widget id='Header1' locked='true' title='Copy Mafia Template (Header)' type='Header'/>
</b:section>
</div>


Tip: You can find this code some lines after <body> tag.


3- Now make two changes in the above code, change maxwidgets='1' to maxwidgets='3' and showaddelement='no' to showaddelement='yes'. Now, the code should look like this:


<div id='header-wrapper'>
<b:section class='header' id='header' maxwidgets='3' showaddelement='yes'>
<b:widget id='Header1' locked='true' title='Copy Mafia Template (Header)' type='Header'/>
</b:section>
</div>


Info: I've changed maxwidgets='1' to maxwidgets='3' which means you can add 3 widgets in Header section. A Header widget is there by default so actually 3 means 2 more widgets.

4- Save your template and go to Page Elements tab to see the changes.

Thursday, June 25, 2009

Blogspot How to: Add Image as Sidebar Background

Some time ago I posted an article How to Add Image as Sidebar Background Heading Similarly you can also add an image in the whole sidebar. Just follow these simple steps and if you feel any difficulty at any step, feel free to ask:

1- On your Blogger Dashboard, go to "Edit Layout" and then "Edit HTML" section.

Remember: Before doing any changes to your blog, always backup your template by clicking the "Download Full Template" link.

2- Now, find the following code...


#sidebar-wrapper {
width: 220px;
float: $endSide;
word-wrap: break-word; /* fix for long text breaking sidebar float in IE */
overflow: hidden; /* fix for long non-text content breaking IE sidebar float */
}


Info: Actually this code is defining the appearance of your sidebar.

3- Add some more style definitions in the above code and your code will become like this...


#sidebar-wrapper {
width: 220px;
float: $endSide;
word-wrap: break-word; /* fix for long text breaking sidebar float in IE */
overflow: hidden; /* fix for long non-text content breaking IE sidebar float */
background-image:url('URL of uploaded image here');
background-repeat: repeat;
background-attachment: scroll;
background-position: right top;}
}

As you can see that the green code is representing newly added text and the red code is to be replaced by the image URL.

4- Don't change any setting in the above code except URL of uploaded image here which will be replaced by the uploaded image.

5- After adding your own image, first see the preview and then save the template if you're happy.

Tip: You can get free professional patterns at http://www.dinpattern.com/

Tip: When I was writing this tutorial, I downloaded this pattern from here. It's size was 42x36 and it weighed only 1.50 kb. You can also try it, the URL is https://blogger.googleusercontent.com/img/b/R29vZ2xl/AVvXsEiJX0k_uWNbyXNMX1rua60j0Rrwd784Jc_w1pIU-RUk1bpcZxQaR8SkHDAb_lt6AUKkIQLVfIlnDYBtE0nVdmWrKRhli_9HQxpmw4LmnwPGLU5WMPnnchc5heG3WEZJP42rZ9tSHfR-iyM/

6- I hope this tutorial was helpful and have a look around, there are many other great tutorials to customize your blog.

How to Add Image as Sidebar Heading Background

To add an image as background of your sidebar heading, follow the simple steps.

1- Go to "Layout" and then "Edit HTML" section.

Remember: In "Edit HTML" section, always click "Download Full Template" before making any changes to your template, this is your backup.

2- Find the following code...


/* Headings
----------------------------------------------- */

h2 {
margin:1.5em 0 .75em;
font:$headerfont;
line-height: 1.4em;
text-transform:uppercase;
letter-spacing:.2em;
color:$sidebarcolor;
}


3- Add the following code in the above code...


background-image:url('URL OF YOUR IMAGE HERE'); /*Enter Image URL here */
background-repeat: no-repeat; /* image repeat horizotally (repeat-x), vertically (repeat-y) or no-repeat */
background-attachment: scroll; /* image should scroll or fixed */
background-position: right top;} /* position of image, first horizontal then vertical */


4- New code should look like this...


/* Headings
----------------------------------------------- */

h2 {
margin:1.5em 0 .75em;
font:$headerfont;
line-height: 1.4em;
text-transform:uppercase;
letter-spacing:.2em;
color:$sidebarcolor;
background-image:url('URL OF YOUR IMAGE HERE'); /*Enter Image URL here */
background-repeat: no-repeat; /* image repeat horizotally (repeat-x), vertically (repeat-y) or no-repeat */
background-attachment: scroll; /* image should scroll or fixed */
background-position: right top;} /* position of image, first horizontal then vertical */
}


Tip: Don't change background-position: right top; because most people want to have their image horizontally on the right side and vertically on the top.

Tip: Also avoid repeating the image and keep background-repeat: no-repeat; as it is.

Tip: Also keep your image on scroll because your heading will also scroll, you can't fix it.

5- Now I'll add a small Blogger icon in the background of my heading to demonstrate the coding we've done above.

6- All I've to change in the step 4 code is to enter the image URL of my own image which is currently a Blogger icon, the code would be...


background-image:url('http://dt.yogtec.com/assets/mainpage/blogger.gif'); /*Enter Image URL here */


The green colored line is my image URL.

7- Now I'll see the preview to see the result, it is something like this...


8- As you can see, the Blogger icon is cropped and not fully visible. So. now I'll increase the line-height: 1.4em; factor in the code of step 4. Lets increase it to 5em and see the preview again, now the result is looking good...


and the final code for my image is something like this:


/* Headings
----------------------------------------------- */

h2 {
margin:1.5em 0 .75em;
font:$headerfont;
line-height: 5em;
text-transform:uppercase;
letter-spacing:.2em;
color:$sidebarcolor;
background-image:url('http://dt.yogtec.com/assets/mainpage/blogger.gif'); /*Enter Image URL here */
background-repeat: no-repeat; /* image repeat horizotally (repeat-x), vertically (repeat-y) or no-repeat */
background-attachment: scroll; /* image should scroll or fixed */
background-position: right top;} /* position of image, first horizontal then vertical */
}


9- I hope the above demonstration was helpful and if you still have any problems you can leave me a comment, I'll try to answer as soon as possible.

10- Keep visiting "Blogger FAQs" and "Happy Blogging".

Blogspot Trick: How to Change Width of Body, Posts and Sidebar

Why to increase the width


1- You can have bigger images in your blogs.

2- Good result in old browsers like Internet Explorer 6.

3- Sidebar in perfect position.

4- It gives your blog an overall clean look.

Steps to follow


1- First of all you need to go to Design tab and then select Edit HTML.

Tip: Click on Download Full Template to backup your template.

2- Find the following code between <b:skin> and </b:skin>.

/* Outer-Wrapper
----------------------------------------------- */
#outer-wrapper {
width: 660px;
margin:0 auto;
padding:10px;
text-align:$startSide;
font: $bodyfont;
}

#main-wrapper {
width: 410px;
float: $startSide;
word-wrap: break-word; /* fix for long text breaking sidebar float in IE */
overflow: hidden; /* fix for long non-text content breaking IE sidebar float */
}

#sidebar-wrapper {
width: 220px;
float: $endSide;
word-wrap: break-word; /* fix for long text breaking sidebar float in IE */
overflow: hidden; /* fix for long non-text content breaking IE sidebar float */
}


Remember: The width factor in #outer-wrapper defined the overall width of blog, in #main-wrapper it defines the width of your posts and in #sidebar-wrapper it defines the width of your sidebar.

3- Now you know the code, you can increase the width in #outer-wrapper and then increase in the #main-wrapper (for posts) or #sidebar-wrapper (for sidebar).

Warning: When you increase the width of any tag, see the preview and if you're satisfied only then you should save.

4- Similarly if you want to change the width of your header, here is the code in your template CSS between <b:skin> and </b:skin>.

/* Header
-----------------------------------------------
*/

#header-wrapper {
width:660px;
margin:0 auto 10px;
border:1px solid $bordercolor;
}


5- Just change the width factor and see the preview, if you're happy with the outcome, save the template otherwise discard the changes.

Tuesday, June 23, 2009

Beginner's Guide to Customize Blogger Header

What We'll Do?


Our objective is to change the outlook of our header as well as play with the header widget itself.

The Default Code


In your Blogger CSS, the header is defined by the following piece of code:

/* Header
-----------------------------------------------
*/

#header-wrapper {
width:660px;
margin:0 auto 10px;
border:1px solid $bordercolor;
}

#header-inner {
background-position: center;
margin-left: auto;
margin-right: auto;
}

#header {
margin: 5px;
border: 1px solid $bordercolor;
text-align: center;
color:$pagetitlecolor;
}

#header h1 {
margin:5px 5px 0;
padding:15px 20px .25em;
line-height:1.2em;
text-transform:uppercase;
letter-spacing:.2em;
font: $pagetitlefont;
}

#header a {
color:$pagetitlecolor;
text-decoration:none;
}

#header a:hover {
color:$pagetitlecolor;
}

#header .description {
margin:0 5px 5px;
padding:0 20px 15px;
max-width:700px;
text-transform:uppercase;
letter-spacing:.2em;
line-height: 1.4em;
font: $descriptionfont;
color: $descriptioncolor;
}

#header img {
margin-$startSide: auto;
margin-$endSide: auto;
}

Understanding the Default Code


-> #header-wrapper describes overall look of your header.

-> #header will describe the overall look of your blog title and description.

-> #header h1 specifically describes your blog title.

-> #header .description will be responsible for the description of your blog.

-> #header img will become affective if you're using an image as your blog title.

Understood the Default Code? Start Making it Tasty!


I'm changing the overall look of header by making modifications in #header-wrapper.

-> To change the width of your header increase the value of width in #header-wrapper from 660px to a higher number i.e. 750px and see the preview.

-> To add color in the background, you can add background-color:#000000; in #header-wrapper. Please note that #000000 is hex code of black color, you can change it with your desirable code. To easily capture colors on web or on your computer, please download a free program ColorPic from here.

-> Our header border is a thin solid line and it is defined by border:1px solid $bordercolor; in #header-wrapper. If you want to change the thickness of your border, change 1px to 2px and preview. You can also create a dotted line border by replacing solid with dotted. Last thing you can do is to change color of your border, you need to replace $bordercolor with #FF0000. Please note that #FF0000 is the hex code for Red color.

Now I'll try to change the appearance of blog title.


-> The blog title is defined by #header h1.

-> Currently the line-height is 1.2em, change it to 1.5em and you'll see that the space occupied by blog title has increased. Please note that this setting will not affect the font size.

-> Now lets try to change the size of the font. We need to add a new tag in #header h1 which is font-size:15px; and then see the preview, if font size is small increase the 15px otherwise decrease it.

-> To change the font of your blog title, you need to replace font: $pagetitlefont; with font-family: arial, "lucida console", sans-serif; now your blog title will appear in Arial font. I'm adding 3 fonts because your visitor might not have Arial font available on his/her computer then 2nd font can be used.

-> By default, your blog title will appear in uppercase because of text-transform:uppercase; property. Change uppercase to lowercase and then the title will become lowercase. If you don't want both uppercase or lowercase, you can remove text-transform:uppercase;.

-> Last property is letter-spacing:.2em; it defines the spacing between two alphabets. You can increase it (.3em, .4em, .5em) or simply remove it and see the preview.

Add more widgets around header in 'page elements' section.


By default, you can't add any widget around your header because there's no "Add a Gadget" option beneath or above your header. So, lets add that option by ourself.

The default header widget code in 'edit html' section.


First of all we must know the default code, only then we can play with it. If you'll go to "Edit HTML" tab and search for <body> you'll find some code like this some lines after <body> tag...

<div id='header-wrapper'>
<b:section class='header' id='header' maxwidgets='1' showaddelement='no'>
<b:widget id='Header1' locked='true' title='Blogger FAQs | Premium Blogger Templates, Tutorials, Hacks, Tips &amp;amp; Tricks. (Header)' type='Header'/>
</b:section>
</div>

Change the header widget code.


All we need to do is to change the value of 'maxwidgets' from '1' to '3' and 'showaddelement' from 'no' to 'yes' and now the code should look something like this:

<div id='header-wrapper'>
<b:section class='header' id='header' maxwidgets='3' showaddelement='yes'>
<b:widget id='Header1' locked='true' title='Blogger FAQs | Premium Blogger Templates, Tutorials, Hacks, Tips &amp;amp; Tricks. (Header)' type='Header'/>
</b:section>
</div>


What I've done is that I've increased the maximum number of widgets that can be installed around our header (maxwidgets='3') and I've also made the option of "Add a Widget" available in your header (showaddelement='yes') you need to save the template here and go to the "Page Elements" section to see the results.

Why it is good to have more widgets around header?


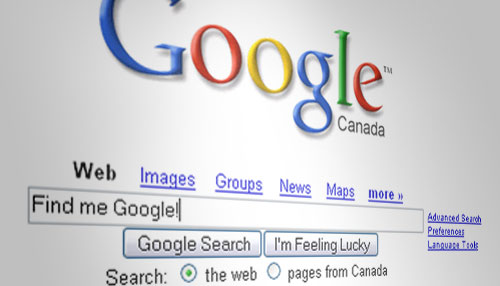
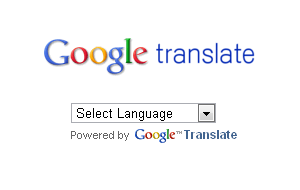
This is an obvious question and the answer is very simple. Your header is the first area where an incoming visitor will look so you can have an Adsense ad, a search engine, a translator or any other important widget in your header.

Monday, June 22, 2009

Ways to Fix/Remove bX Errors in Blogger


How to Fix or Remove Blogger bX Errors


Some days ago, I tried to install a widget in one of my custom templates and then I got this error (bX-xxxxxx). I tried to solve the issue by myself by doing some random things and I was finally able to solve the problem. Some people also face this problem when trying to upload a custom Blogger template. Here are the techniques you can try.


1- Change ids of Blogger widgets if you can't upload a custom xml template.

This one is a classical method and trusted by many Blogger experts, to do this follow the steps:

1- Open the downloaded template in Wordpad or Notepad++ (Download Notepad++).

2- Search (Ctrl+f) for widget id=

3- You'll find something like <b:widget id='example1' just replace the number '1' with some other number for example 5, 9, 15 etc. So you can make it <b:widget id='example5', <b:widget id='example9', <b:widget id='example15' etc.

4- Find all widget id= and repeat the step 3 but don't repeat any number i.e. If you've assigned a widget number '9' then don't use '9' again.

5- Once you've changed the ids, save your template and upload it by going to Blogger -> Layout -> Edit HTML and upload.


2- Clear your browser cache & cookies if you can't add/remove/edit widgets.


Google has provided detailed instructions for all browsers to clear cache and cookies, you can see it here:

http://www.google.com/support/accounts/bin/answer.py?hl=en&answer=32050


3- Use some other browser if you can't add/remove/edit widgets.


This is also a good method. You can also try to work in some other browser. For example if you're working in Internet Explorer and continuously facing this problem, switch to Mozilla Firefox.

Blogger Help: How to Delete My Blog

How to Delete a Blogger Blog

Alright, if you are really tired of blogging or just want to delete a test blog then here is the simplest way to do that. Before moving further, let me tell you that you can recover a deleted blog within 90 days with all posts.

Ready? Lets Delete a Blog!


First of all, click on the Settings tab of the blog you want to delete. After that, you'll be in the Basic tab. Now, click the Delete blog link.

Blogger Settings tab Delete Blog
Blogger will give you a warning. At this point, it would be great to download a copy of your blog on your hard drive. so click the export it link and on the next page click DOWNLOAD BLOG button to download your blog on hard drive.
After that we can safely delete our blog. So go back one page and click on DELETE THIS BLOG button to delete your blog.

Blogger Blog Delete Warning

Oops! I've Accidentally Deleted My Blog!


Don't Worry, you can easily recover a deleted blog within 90 days. On your Blogger Dashboard, find the deleted blog. If you can't find the deleted blog, then it might be hidden so click the Show all link in Displaying 1 of 57 blogs – Show all line. Simply find the blog and click Undelete this blog link to recover your deleted Google Blogger blog.

Undelete Blogger Blog

Wanna Help Beta Templates?


If you like our tutorials or templates, feel free to help us. All you have to do is to add our link any where in your blog or share this blog or post with your friends. Instructions for adding our link is given in the footer of this page.

Saturday, June 20, 2009

The Right Way to Copy from Microsoft Word to Blogger

When you want to post some data compiled in Microsoft Word to your Blogger post editor, you might get an error i.e. Your HTML cannot be accepted: Tag is not allowed:

Actually Microsoft Word automatically apply some meta tags to the documents which are illegal (not allowed) in Blogger posts. These tags are like these:


<META HTTP-EQUIV="Content-Type" CONTENT="text/html; charset=windows-1252">
<META NAME="Generator" CONTENT="Microsoft Word 97">


To get rid of this error, you can paste your Word document in a simple Notepad, Wordpad or Notepad++ (Recommended) and then copy it again and paste it to Blogger post editor. Then you can continue working with the post and Publish it.

Tip: You can free download Notepad++ from here.

A Recent Comments Widget to Display Last 5 Comments in Sidebar

Recent comments widget will display last 5 comments on your blog. To setup this widget follow these simple steps:

1- Go to Layout and on the sidebar, click on Add a Gadget.

2- A new small window will appear with a lot of gadgets scroll down and find the Feed gadget.

3- The Feed gadget will ask you for feed URL, you need to http://YOURSITE.blogspot.com/feeds/comments/default and replace YOURSITE with your actual blog url.


How to Setup Recent Comments Widget


4- Now you can see last 5 comments on your blog in your sidebar.


How to Setup Recent Comments Widget


5- Press Save button and enjoy.

How to Change Sidebar Title Font, Size & Color

Blogger sidebar title fonts are very easily customizable like any other section. You just need to find the default CSS definitions of these titles and then we can easily implement our own styles in it.

Let's first check the default style definitions for these titles:


To find this code, go to Layout | Edit HTML and search.

h2 {
margin:1.5em 0 .75em;
font:$headerfont;
line-height: 1.4em;
text-transform:uppercase;
letter-spacing:.2em;
color:$sidebarcolor;
}

1- Change family i.e. Arial, Times New Roman etc.


Currently, sidebar title font is defined by font:$headerfont;. It means that your header font and sidebar title font is same but we can have them according to our wish by adding a font-family property.

h2 {
margin:1.5em 0 .75em;
font-family:"Times New Roman",Georgia,Serif;
line-height: 1.4em;
text-transform:uppercase;
letter-spacing:.2em;
color:$sidebarcolor;
}

Info: As you can see that I've added 3 fonts (Times New Roman, Georgia, Serif) because a visitor might not have the 'Times New Roman' font installed on his/her computer, so the browser can chose the other two fonts of first-come first-serve basis.

2- Change size.


Simply add font-size property in the default code.

h2 {
margin:1.5em 0 .75em;
font:$headerfont;
line-height: 1.4em;
text-transform:uppercase;
letter-spacing:.2em;
color:$sidebarcolor;
font-size:40px;
}

Note: I've added font-size:40px; in which 40px is the size. You can change it according to your wish because 40px is fairly large number.

3- Change color i.e. red, green etc.


Currently, color:$sidebarcolor; property is defining the color. It means that title color is dependent on the sidebar color i.e. sidebar color and title color is same. We can add our own color in it by removing color:$sidebarcolor; and adding color property.

h2 {
margin:1.5em 0 .75em;
font:$headerfont;
line-height: 1.4em;
text-transform:uppercase;
letter-spacing:.2em;
color:#0000FF;
}

Remember: #0000FF is the hex code of blue color.

Tip: You can capture any color on screen and get it's hex code to use it any where, download ColorPic which is a free utility to do that.

Friday, June 19, 2009

How to Add Image in Header Background


Introduction!

Blogger default templates don't have images in the header background. You can add one that suits your taste by changing some style sheet elements in your "Edit HTML" tab between <b:skin> and </b:skin>.

How to Do This???

Please note that following code is responsible for overall header appearance:


#header {
margin: 5px;
border: 1px solid $bordercolor;
text-align: center;
color:$pagetitlecolor;
}


We can change this code by adding some additional tags. So, find the above code in your template style sheet and replace it with the following code:


#header {
width:660px; /* width of header in pixels */
margin:0 auto 10px; /* margin from other elements like posts and sidebar */
border:1px solid #ccc; /* width, type and color of header border */
background: #fff url(YOUR IMAGE URL) no-repeat top right; /* top right indicates background position */
}


You can do changes and see what happens in "Preview" mode. Just change "YOUR IMAGE URL" with actual URL of your image which you want to use as background. You can always try to search for more backgrounds on Google.

Tip!

Always save your template whenever you're not sure about what you're doing. You can do this by clicking on "Download Full Template" link in "Edit HTML" tab.

Remove Firefox Dotted Border Links

Introduction!

you might have noticed that Firefox automatically creates dotted border around links. You can prevent this by telling Firefox what you want to do.

How to Do This???

All you need to do is to add some special CSS style tags anywhere in your style sheet between <b:skin> and </b:skin>. The special CSS is:

a:active
{
outline: none;
}

a:focus
{
-moz-outline-style: none;
}

Good to Know!

Please note that "The :active pseudo-class adds a special style to an activated element." & "The :focus pseudo-class adds a special style to an element while the element has focus." (W3Schools.Org)

You can read more about a:active at http://www.w3schools.com/CSS/pr_pseudo_active.asp and about a:focus at http://www.w3schools.com/CSS/pr_pseudo_focus.asp

How to Post Links in Comments

How to Post Links in Blogger Comments


Let's get started

Ever wondered how to post links in Blogger comments??? Let me tell you a very simple way to do that. A basic HTML link is like this:


<a href="URL">Title</a>

You need to post the above code in the comment box and then all you need to do is to replace "URL" with the URL of the site you want to link to and "Title" with the title of your link.

A Simple Example!

I want to link to "http://www.blogger.com/" with title "Blogger". The code which I'll put in the comment box, will be:


<a href="http://www.blogger.com/">Blogger</a>


Final Words!

Well, it was a simple tutorial regarding Blogger. There are a lot of things for you to discover in Blogger. I encourage to see other sections of this blog for more useful info.

How to Change Header Title Font, Size & Color

Intro!

This is a simple Blogger tut to tell you how to change the header title font. First of all, you should know which CSS code is responsible for your header title appearance:


#header h1 {
margin:5px 5px 0;
padding:15px 20px .25em;
line-height:1.2em;
text-transform:uppercase;
letter-spacing:.2em;
font: $pagetitlefont;
}


How to modify the style???


Now you know the CSS of your title. You can make modifications in it and see your results. Remember, these CSS changes will be visible only on main page because your header title behaves as a link in all other pages. First, let's customize it's appearance on main page.

----------------------------------------------------------------------------------
=> Add a 'font-family' Property!
----------------------------------------------------------------------------------

I want my header title to be in 'Arial' font, the code will be:

#header h1 {
margin:5px 5px 0;
padding:15px 20px .25em;
line-height:1.2em;
text-transform:uppercase;
letter-spacing:.2em;
font-family: arial, "lucida console", sans-serif;
}

Please note that I'm using 3 fonts (arial, "lucida console", sans-serif) in the above CSS. The reason is that if 'Arial' is not available on your visitor's pc then the font on 2nd position ("lucida console") will be used.

----------------------------------------------------------------------------------
=> Add Style Definitions for Header Title Font on Pages Other Than Main Page!
----------------------------------------------------------------------------------

As I told you before that your header title works as a hyperlink in all other pages of your blog other than the main page, so let's add some more CSS to customize the appearance on pages other than the main page.


#header h1 {
margin:5px 5px 0;
padding:15px 20px .25em;
line-height:1.2em;
text-transform:uppercase;
letter-spacing:.2em;
font: $pagetitlefont;
}

/* I've added a new tag which will change header title appearance on pages other than main page */

#header h1 a {
text-decoration:none; /* you can add 'underline' or 'overline' instead of 'none' */
color: #FFFFFF; /* you can add any color you want by changing 'FFFFFF' */
font-size: 25px; /* means title font size will be 25px on all pages other than the main page */
}

/* hover definitions will become alive when you bring mouse over title, this will also work on all pages other than main page */

#header h1 a:hover {
text-decoration:underline; /* title font will be underlined on mouse over */
color: #000000; /* title will become black on mouse over */
font-size: 10px; /* guess what will happen to font size on mouse over */
}

Good to Know!

I always try my best to share all the knowledge I've with you guys. You can always do experiments and share your results with me in comments. You should go to W3Schools.Org to read more about font properties.

Thursday, June 18, 2009

Blogspot How to: Change Post Title Font, Size & Color

The default Blogger-Blogspot layouts (like Minima) don't allow you to change or customize the look of post title font through Fonts & Colors tab. An HTML/CSS expert can easily change the post title font from the Edit HTML tab but that's not easy for a non-technical person. In this tutorial, I'll tell you how to fully customize the post title font by going to Design -> Template Designer -> Advanced.

Note: This tutorial is for those who are still using the old layout templates like Minima. If you're using a new template like Awesome Inc, Simple, Picture Window, Ethereal, travel or Watermark then refer to the new tutorial: Blogspot How To: Change Post Title Color in Blogger Template Designer


Warning: Before making any changes, you should backup your current template.


1- Find the Existing CSS Code.


From the Dashboard, go to Design then Edit HTML tab.


Find the following code:

.post h3 {
margin:.25em 0 0;
padding:0 0 4px;
font-size:140%;
font-weight:normal;
line-height:1.4em;
color:#333333;
}

.post h3 a, .post h3 a:visited, .post h3 strong {
display:block;
text-decoration:none;
color:#000000;
font-weight:normal;
}

.post h3 strong, .post h3 a:hover {
color: #000000;
}


Blogspot How to: Change Post Title Font, Size & Color


The code, you found above, is responsible for the appearance of post title. If you're not using Minima Blogger-Blogspot template then you might not be able to find this code so please leave your comment with blog address and I'll try to help. If you've found the code then continue with the tutorial.

2- Replace the Existing CSS Code With New CSS Code.


In this step, you have to replace the default code with the following code:

.post h3 { margin: .25em 0 0; padding: 0 0 4px; color: $titlecolor; font: $posttitlefont; }
.post h3 a, .post h3 a:visited, .post h3 strong { text-decoration: none; color: $titlecolor; }
.post h3 strong, .post h3 a:hover { color: $titlehovercolor; }


3- Customize the Post Title Font in Design -> Template Designer -> Advanced Tab


Stay in the Edit HTML tab. Scroll down a little and you'll find this code:

/* Variable definitions
====================


Copy and paste the following code right below the above code:

<Variable name="titlecolor" description="Post Title Color"
type="color" default="#c60" value="#cc6600">
<Variable name="titlehovercolor" description="Post Title Hover Color"
type="color" default="#c60" value="#cc6600">
<Variable name="posttitlefont" description="Post Title Font"
type="font" default="normal normal 18px 'Trebuchet MS',Trebuchet,Arial,Verdana,Sans-serif" value="normal normal 18px 'Trebuchet MS',Trebuchet,Arial,Verdana,Sans-serif">


After adding the above codes, the result would look something like this:

/* Variable definitions
====================
<Variable name="titlecolor" description="Post Title Color"
type="color" default="#c60" value="#cc6600">
<Variable name="titlehovercolor" description="Post Title Hover Color"
type="color" default="#c60" value="#cc6600">
<Variable name="posttitlefont" description="Post Title Font"
type="font" default="normal normal 18px 'Trebuchet MS',Trebuchet,Arial,Verdana,Sans-serif" value="normal normal 18px 'Trebuchet MS',Trebuchet,Arial,Verdana,Sans-serif">


After that, you can just save your template. Now, you can easily customize the post title font through Design -> Template Designer -> Advanced tab.

Need Help?


If you've any problem in this tutorial the feel free to leave a comment, I'll try to answer as soon as possible :-)

Blogger/Blogspot SEO (Search Engine Optimization) For Dummies

Make Blogger-Blogspot SEO Friendly

My experiences to make Blogger-Blogspot Search Engine friendly. Get more traffic by using these simple techniques. A lot of people think that Blogger-Blogspot is owned by Google so they would have an advantage in search results. That's not true at all. If you have a personal blog then SEO (Search Engine Optimization) might not be appealing to you but a professional blog must be search engine friendly.


1- Add a Blog Archive Gadget in Your Sidebar


Linking is the mother of SEO. A highly linked blog will be ranked higher in Google search results. It is not easy to get links from high quality sites but you can do internal linking by linking your posts with each other. The easiest way is to add a Blog Archive gadget in your sidebar. Go to Design then Page Elements tab. Click Add a Gadget link on your sidebar and chose Blog Archive gadget from the list. Don't change any options and save the gadget.

Blog Archive Gadget

The Blog Archive gadget will remain in your sidebar plus it contains links to all your posts and it will appear on every page of your blog. As a result, every time search engine will crawl any page of your blog, it will also find links of other pages as well because of Blog Archive gadget.

2- Replace Blog Title With Post Title on Post Pages


To understand this, lets create a test post with title This is my test post. The title of my test blog is My Test Blog. After publishing the test post, I opened it and this is how the title of my test post page appears.

Swap Blog Title with Post Title in Blogger-Blogspot

As you can see the blog title comes before the post title. So, we need to make sure that, on post pages, the post title must come first and then anything else. Then, it would be easier for search engines to index your post title as the page title. To do that, go to Design then Edit HTML tab and search for this code:
<title><data:blog.pageTitle/></title>

After that, replace it with the following code:
<b:if cond='data:blog.pageType == &quot;item&quot;'>
<title><data:blog.pageName/> - <data:blog.title/></title>
<b:else/>
<title><data:blog.pageTitle/></title>
</b:if>

Now, I checked the published test post page again and this is how my page title looked like:

Swap Blog Title with Post Title in Blogger-Blogspot 2

Now, your post title will appear first on search results. This is a very effective technique for Blogspot/Blogger SEO.

3- Submit Your Blog Sitemap to Google Through Google Webmaster Tools


It is very important to make sure that all the blog pages/posts are indexed by search engines. Google has provided us an easy solution through Google Webmaster Tools. It is a free service and you can use it with your Google/Blogger account.

Google Webmaster Tools Logo

Here is a tutorial to submit Blogger/Blogspot sitemap to Google:

How to Submit Blog Sitemap to Google Through Google Webmaster Tools

Video Tutorial: How to Submit Blog Sitemap to Google Through Google Webmaster Tools

4- Use Google Adwords Keyword Tool


This is the most amazing free tool from Google. When a user is looking for something, he/she will type it and hope for the best search results. So, as a webmaster or a blog owner you should ask yourself these questions:

  1. What are the keywords these users are using?
  2. Which keywords are used more than others?
  3. How many people are searching for a specific keyword in US or some other location?
  4. Are my competitors also using those keywords?
  5. How many sites are targeting certain keywords?


The simplest way to know is to use Google Adwords Keyword Tool. I've read a great article for using this tool:

Using Google AdWords Keyword Tool for SEO

5- Use Meta Description Tags to Improve Click-through Rate


Our first goal is to get a better position in SERPs (Search Engine Result Pages) but what if a blog is appearing at the 1st position for a certain keyword search but users aren't clicking it? Because People use illegal methods to get higher rankings in search results but such techniques often result in poor click-through rate. To improve click-through rate, you have to:

  1. Use natural titles for blog and posts.
  2. Use meta description tags to convey what your blog/post is all about.
  3. Use the findings of Google Keyword Tool to write better posts.
  4. Don't use same keywords again and again, try something real.

You can know more about meta tags here:

What are Meta Tags & How to Add Meta Tags in Blogger/Blogspot

Some Important Things to Remember!


All the SEO techniques can't do any magic. You can only do your best and then hope for the best. If you've good quality original content on your blog and you're successfully implementing all basic SEO techniques then it will take some time to build your search ranking. Ask your friends to link to your blog, share your blog links on Twitter and Facebook.

Blogspot How To: Remove "Subscribe to: Posts (Atom)" Text

Where does this text appear?


This text appears by default on all Blogger templates under the posts. It is normally annoying for most of the users but you can easily remove it.

How to Remove it???


You can easily remove it by following these simple steps:

Steps!


1- Go to Design and then Edit HTML.

2- Find the following code:

.feed-links {
clear: both;
line-height: 2.5em;
}


3- Simply replace the above code with the following code:

.feed-links {
display:none;
}


4- Check the Preview button to see the result.

Translate Blog in Other Languages with Google Translate Widget

Translate Blog in Other Languages with Google Translation Widget


Google translation widget allows your blog readers to translate your blog in their language without leaving the page. This widget is powered by Google Translate technology and can be easily installed to any blog.

Steps to Add the Google translate Widget


  1. Just go to the following page:

    http://translate.google.com/translate_tools
  2. Follow all the steps there and make sure to expand the 'Show optional settings' link.

    Translate Blog in Other Languages with Google Translate Widget

  3. If you're using Google Analytics then tick the 3rd option of 'Advanced' option. By doing this, you'd be able to track how many users are translating your blog.
  4. After that, you can click 'Add to Blogger' button and the widget will be automatically installed at the top of your sidebar.
  5. That's it for the tutorial.

Please Note!


Although Google Translate widget is the easiest way to allow blog translation in other languages but it's a JavaScript gadget. If you don't have a lot of non-English visitors then don't install this gadget because it takes some time to load.

Wednesday, June 17, 2009

Blogspot Tutorial: How to Change Default Blogger Favicon


A good favicon means good brand
In this tutorial, I'll tell you how to change the default favicon present in every Blogspot/Blogger blog. A favicon is usually a 16x16 .ico file and it is displayed with the title of a blog in a browser. So, we can add our own favicon to make our blog more personal.

Ready? Lets Add a Custom Favicon


1- Search for a free custom favicon on Google and you'll find a lot of them.

2- Blogger doesn't allow to upload .ico files so you need to upload your favicon on Google Sites. Just log in there with your Blogger account, create a site and upload your favicon there.

3- Go to Design then Edit HTML tab.

4- Find this code in your template:

]]></b:skin>

4- Paste the following code right below above line like this:

]]></b:skin>
<link rel="shortcut icon" href="YOUR FAVICON URL" />
<link rel="icon" href="YOUR FAVICON URL" />


4- Just change the YOUR FAVICON URL with the URL or address of your favicon uploaded in step 2.

5- Save your template and enjoy.

Tuesday, June 16, 2009

Blogspot Tutorial: Add StumbleUpon Button in Posts

Add StumbleUpon Button in Blogger for Traffic

StumbleUpon is a popular social bookmarking site where users share their favorite web pages. You can add StumbleUpon button in the footer of each post. This button would make it easy for readers to share your blog content with the rest of the world. This can drive more traffic to your blog.

Lets Add the StumbleUpon Button!


1- Log in to your Blogger account and go to Design then Edit HTML tab.

2- Check Expand Widget Templates option and the page will automatically refresh.

3- Find the following line of code:

<data:post.body/>

The above code might be in this form:

<p><data:post.body/></p>

4- Paste the following code right after the above code:

<a expr:href='&quot;http://www.stumbleupon.com/submit?url=&quot; +data:post.url'><img alt='StumbleUpon' border='0' src='http://www.stumbleupon.com/images/small_su_logo.png'/>
</a>


5- Save your template and you're done.

Want More Buttons?


StumbleUpon has introduced many new badges/buttons with clear instructions, feel free to give 'em a try. Here is the link:

http://www.stumbleupon.com/buttons/

Blogspot Tutorial: Add a Twitter Retweet Button in Posts

How to Add a Twitter Retweet Button in Blogger-Blogspot Posts
You can easily add retweet buttons on your Blogger-Blogspot blog. Such buttons allow blog readers to share content on Twitter with others. When people will tweet about your blog, you'll get free marketing and traffic for your blog.

Whoa! We Can Use 2 Buttons Here!


Yes, we can add 2 different type of buttons provided by different sites. twitthis isn't very popular but tweetMeme is really shining out there. Anyways, both buttons will do same thing so it depends on your choice.

Add twitThis Twitter Retweet Button


Add Tweetthis Button in Your Blogger Posts to Get Massive Traffic

To add twitthis Twitter button, follow the following steps:

1- Go to Design and then Edit HTML tab.

2- Check Expand Widget Templates.

3- Find this tiny piece of code:

<b:if cond='data:post.title'>

4- Add following code just before the previous line of code:

<div style='float:right; margin-left:14px;'>
<a expr:href='&quot;http://twitthis.com/twit?url=&quot; + data:post.url + &quot;&amp;title=&quot; + data:post.title'><img alt='TweetThis Button' border='0' src='https://blogger.googleusercontent.com/img/b/R29vZ2xl/AVvXsEjLBoVLbbqjNpO6YVIDBXOSCGsxnowLwHFRRDQIVu0jxdRKh-wjCelrmHVT3W4XGWl5ABn5NaW2zv81jgsOU3vmsfRECPDm4E-P3MshyYwlSCr1gwpcP7_ahSTh7C2jxY8uRS94PawyVYg/s1600/Twitter.gif'/></a>
</div>


5- Now, we have added our button just below the posts, so save the template and see the result.

Add tweetmeem Twitter Retweet Button


Add Tweetthis Button in Your Blogger Posts to Get Massive Traffic
Adding tweetmeme Twitter Retweet button is also very easy. Just follow all the steps of twitthis Twitter Retweet button but the code to add in step 4 will be this:

<div style='float:right; margin-left:14px;'>
<script type='text/javascript'>
tweetmeme_url = &#39;<data:post.url/>&#39;;
</script>
<script src='http://tweetmeme.com/i/scripts/button.js' type='text/javascript'/>
</div>

Wanna Add Some More Such Buttons?


I've also written tutorials to add StumbleUpon button, many social bookmarking buttons and Facebook Share button. Feel free to check them out!

Sunday, June 14, 2009

How to Add Your Own Image as Blog Background in the Template Designer

Add Your Own Image As Background in the Template Designer

The most special thing about Blogger-Blogspot is personalization and ease of use. People love to have a personal image as their blog background. You can see my previous tutorial which makes it fairly easy to add an image as blog background in the older Blogger-Blogspot templates (also called layouts). Now, you can design your very own templates with the new Template Designer. But you can't add your own image as background without knowing HTML and CSS. So, in this tutorial, I'll try to make it very simple to add your own image as blog background.

Things to Do in This Tutorial


So, we need to do 3 different things in this tutorial which are:

1- Select an image from your computer or web.
2- Upload your image on Blogger-Blogspot.
3- Add the uploaded image as blog background.

1- Select an Image From Your Computer or Web.


First of all you've to select an image either from web or your computer. If you like some image on the web then it is better to save that image on your computer. If you've a professional blog then go for a pattern (Download Patterns) as background otherwise personal bloggers might wanna add their personal image as blog background.

2- Upload Your Image on Blogger-Blogspot.


The most convenient way to upload an image on web is to upload it to your Blogger-Blogspot blog. Blogger provides each user 1gb free space so use it. Here is a tutorial to upload your images on Blogger:

How to Host Images on Blogger

After uploading your image on Blogger-Blogspot, make sure to copy the address/URL of your uploaded image because that will be used later.

3- Add the Uploaded Image as Blog Background.


I'm assuming that you've uploaded your image and you've the address/URL of your uploaded image. Now go to Design then Template Designer. From the left column select Advanced and then chose Write CSS. You can click the following image for help:


In the box there, we can add our custom CSS code. So, you need to add the following code in that white box:

body { background: url(URL of Image you uploaded in step 2); background-color: none; }
.body-fauxcolumn-outer div { background: none !important; }


If you're using a pattern then the above code will work great. However, if you're using a big image then you need to take care of the alignment as well. The code for an image will be something like this:

body { background: url(URL of Image you uploaded in step 2) no-repeat scroll top left; background-color: none; }
.body-fauxcolumn-outer div { background: none !important; }


There are 4 things in the code above, let me introduce them to you.

1- no-repeat


It makes sure that the large image doesn't repeat itself. You can change it to repeat if you want to repeat your background image.

2- scroll


You might have noticed that the background image also moves when you scroll down your blog. If you want the background image to stay still in the background then you can change scroll to fixed.

3- top


Top is indicating the vertical positioning of the background image. You can change the vertical positioning to center or bottom.

4- left


Left is responsible for horizontal positioning of your background image. You can also change this value to center or right.

Final Thoughts


I've tried my best to make the HTML and CSS stuff easy for you guys. however, if you still feel any difficulty, feel free to leave me a comment. You can also refer to an official tutorial provided by Google about adding custom CSS in Template Designer.

Saturday, June 13, 2009

10 Most Popular Blogger (Blogspot) Templates

10 Most Popular Blogger-Blogspot Templates

People are doing amazing thing with Blogger-Blogspot these days. One of them is to convert Wordpress themes to Blogger-Blogspot with full compatibility. I've compiled a list of most popular Blogger-Blogspot templates. Check it out and feel free to add your suggestion as well.

1- Notepad Chaos


Notepad Chaos Blogger-Blogspot Templates
Notepad Chaos was originally designed by Evan Eckard and released by Smashing Magazine as a free Wordpress theme. A Turkish blogger, Gosu, converted it to Blogger-Blogspot. Notepad Chaos theme has a vibrant & colorful background which makes it a master piece.

2- Craftwork


Craftwork Blogger-Blogspot Templates
Craftwork was originally released as a free Wordpress theme by EZwpthemes. I converted it to Blogger-Blogspot and since then it is driving huge traffic to my blog. It is the most viewed, downloaded and commented template on Beta Templates.

3- Creative Art


Creative Art Blogger-Blogspot Templates
Creative Art is also converted to Blogger-Blogspot by Gosu. It has amazing combination of grunge and notepaper design which makes it an eye candy. It was designed by FTL and released by Smashing Magazine as a free Wordpress theme.

4- Extreme Georgia


Extreme Georgia Blogger-Blogspot Templates
Smashing Magazine organized a typographic layout competition and Extreme Georgia was ranked 2nd in that contest. It was originally designed by MentariWorks and converted to Blogger-Blogspot by Klodian at Deluxe Templates. It is a clean and minimal template with 2 column layout.

5- Night Sky


Kids Style Blogger-Blogspot Templates
Night Sky is an original Blogger-Blogspot template. It is created by an Indian web design agency Ray Creations. They have also released Night Sky 2.0, make sure to check that out too.

6- Smash My Typo


Smash My Typo Blogger-Blogspot Templates
Smash My Typo was originally created as a typographic layout by Alexander Dahlberg for Smashing Magazine's typographic design contest. I converted it to Blogger-Blogspot after so many requests from readers.

7- Art Template


Art Template Blogger-Blogspot Templates
Art Template is a very beautiful Blogger-Blogspot template created by EZwpthemes and converted to Blogger-Blogspot by Gosu. The template features a stylish background and widgets.

8- Kids Style


Kids Style Blogger-Blogspot Templates
Kids Style is a very cute Blogger-Blogspot template. It was originally designed by EZwpthemes and converted to Blogger-Blogspot by Klodian.

9- Water Color


Water Color Blogger-Blogspot Templates
Water Color is colorful and vibrant Blogger-Blogspot template with bright and grungy background. It was converted to Blogger-Blogspot by Alvaris Falcon and deigned by TemplateLite.

10- Infinity


Infinity Blogger-Blogspot Templates
Infinity is simply gorgeous Blogger-Blogspot template. It was also released by Smashing Magazine as a free Wordpress theme and I've converted it to Blogger-Blogspot. The theme is a creation of Vikiwords Studio from China.

Final Thoughts


I'm sure that there are much more beautiful Blogger-Blogspot templates out there. Such lists can't be perfect but we can appreciate the hard work of designers and coders. Blogger has just released a Blogger Template Designer so we might see lesser use of custom templates in the future.

Wednesday, June 10, 2009

Blogger Template Designer For Beginners

Blogger Template Designer for Dummies
Some days ago, Blogger announced a new feature Template Designer through which users can easily design and customize layouts. The Template Designer was only available as a beta feature to Blogger in Draft users. From today, this awesome feature is available to everyone. Just log in to your Blogger account and you'll see a new option Design on your dashboard. In this guide, I'll try to explain everything you need to know about the Blogger Template Designer.

Where is Blogger Template Designer?


Just log in to your Blogger account. From your dashboard, go to Design and then open the Template Designer tab. Now, we can start designing a template.

Start Using Blogger Template Designer


So, the Template Designer has 4 sub sections. Now, I'll explain each of them seperately.

1- Templates Tab


Blogger has initially provided 5 templates to chose from. Each template has it's own flavors with different color schemes. You can chose any template and start editing.

2- Background Tab


In this section, you can chose from thousands of background images. People just love background images. The images are provided by iStockphoto and are nicely divided into categories. Template Designer also suggests some nice color schemes which could be helpful.

3- Layout Tab


Layout section is the heart of new Template Designer. Just think, how difficult it was, for a non-technical person, to add another column in the template or change the width of the blog. Now, all of this is changed thanks to the Template Designer. You can chose the layout of your blog from Body layout tab. Footer layout tab lets you easily chose the footer layout like 3 columns footer. And you can change the width of body, sidebars & columns from Adjust width tab.

4- Advanced Tab


Do you remember the Fonts & Colors tab which lets you change the colors and fonts of your blog? Same function is performed in Advanced tab. It is so easy and real-time because you can preview every change.

What About Custom Blogger/Blogspot Templates?


I think, now it is time to stop using custom Blogger templates which are ususally converted from Wordpress. Custom Blogger/Blogspot templates are very unfriendly to non-technical people. Often people complain that their blog looks awful in old browsers like Internet Explorer 6. Blogger is the easiest way to get yourself online and it's continously improving. Don't pay anyone for anything related to Blogger/Blogspot. Now, you can easily customize every aspect of a Blogger/Blogspot blog. Blogger/Blogspot is designed for non-technical people so feel free to give it a try.

What's Next?


I can't wait to see awesome designs coming up with the Template Designer. You can easily change everything without any technical knowledge. Of course, every change can be viewed in real time. If you've customized your blog with the Template Designer, feel free to leave your blog address in the comments.

How to Remove Header Borders in Minima Blogger Template

How to Remove Header Borders in Blogspot/Blogger

This is a really quick and easy trick. Whenever, someone creates a new blog, Blogger automatically chooses Minima Blogger Template by default. I really love this minimal template but the border lines around header doesn't make any sense. So, in this tutorial, Ill tell you how you can very easily remove the border lines around header.

Steps to Remove Borders Around Header/Title


1- Just go to Layout and then Edit HTML tab.

2- Find this code:

#header-wrapper {
width:660px;
margin:0 auto 10px;
border:1px solid $bordercolor;
}

#header-inner {
background-position: center;
margin-left: auto;
margin-right: auto;
}

#header {
margin: 5px;
border: 1px solid $bordercolor;
text-align: center;
color:$pagetitlecolor;
}


3- Delete the two lines from the above code which are border: 1px solid $bordercolor; and again border:1px solid $bordercolor;. After that, the code should look something like this:

#header-wrapper {
width:660px;
margin:0 auto 10px;
}

#header-inner {
background-position: center;
margin-left: auto;
margin-right: auto;
}

#header {
margin: 5px;
text-align: center;
color:$pagetitlecolor;
}


4- Preview your template and save if happy with the results.