Saturday, July 25, 2009

Blogger Templates: Smash My Typo

Smash My Typo Blogger Template


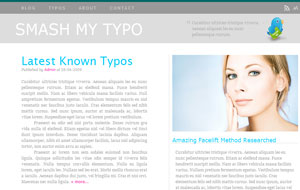
Smash My Typo is a popular Blogger template with a focus on typography and simplicity. It has 2/3 columns layout and minimal design.

Features: white, minimal, blue, two columns, fixed width, Twitter, RSS feed, top menu, 3 columns footer.


Friday, July 24, 2009

Blogger Widget: Show Total Posts & Comments

How to Restore Pencil to Edit Posts

You might have noticed that some Blogger blogs have widget installed in the sidebar which displays total posts and comments of that blog. Well, you can also install such a widget in your blog as well. A simple script allows us to show off total posts and comments on our blog.

Steps to Add the Widget!


  1. Go to Layout | Page Elements.
  2. Click Add a Gadget link in your sidebar where you want to add this widget.
  3. When a new window is opened, chose HTML/JavaScript as your widget and add the following code in the Content field.
    <script style="text/javascript">
    function numberOfPosts(json) {
    document.write('Posts: <b>' + json.feed.openSearch$totalResults.$t + '</b><br>');
    }
    function numberOfComments(json) {
    document.write('Comments: <b>' + json.feed.openSearch$totalResults.$t + '</b><br>');
    }
    </script>
    <font color="blue"><script src="http://bloggerfaqs.blogspot.com/feeds/posts/default?alt=json-in-script&callback=numberOfPosts"></script>
    <script src="http://bloggerfaqs.blogspot.com/feeds/comments/default?alt=json-in-script&callback=numberOfComments"></script></font>

  4. Save your widget and see the blog.

Widget Customization!


Replace http://bloggerfaqs.blogspot.com/ with your own blog URL. You can change the Posts: and Comments: text to whatever you like for example you can replace Comments: with Total No. of Comments:.

Wednesday, July 15, 2009

Blogger Widget: Show Upto 25 Recent Comments with Summaries

A simple recent comments widget allows us to display 5 latest comments in sidebar. Now you can display up to 25 comments with summaries of the comments.

Steps to Install the Widget


  1. Go to Design then Page Elements.
  2. Click on Add a Gadget link in your sidebar
  3. A new window will open with a list of widgets, chose HTML/JavaScript widget from there.
  4. Once that widget is opened, paste the following code in the Content area of the widget:
    <ul style="font-style: italic;"><script style="text/javascript">
    function showrecentcomments(json) {
    for (var i = 0; i < 20; i++) {
    var entry = json.feed.entry[i];
    var ctlink;

    if (i == json.feed.entry.length) break;
    for (var k = 0; k < entry.link.length; k++) {
    if (entry.link[k].rel == 'alternate') {
    ctlink = entry.link[k].href;
    break;
    }
    }
    ctlink = ctlink.replace("#", "#comment-");
    var ptlink = ctlink.split("#");
    ptlink = ptlink[0];
    var txtlink = ptlink.split("/");
    txtlink = txtlink[5];
    txtlink = txtlink.split(".html");
    txtlink = txtlink[0];
    var pttitle = txtlink.replace(/-/g," ");
    pttitle = pttitle.link(ptlink);
    if ("content" in entry) {
    var comment = entry.content.$t;}
    else
    if ("summary" in entry) {
    var comment = entry.summary.$t;}
    else var comment = "";
    var re = /<\S[^>]*>/g;
    comment = comment.replace(re, "");

    document.write('<li style="text-align:left">');
    document.write('<a href="' + ctlink + '">' + entry.author[0].name.$t + '</a>');
    document.write(' on ' + pttitle);
    document.write('<br>');
    if (comment.length < 150) {
    document.write(comment + '...<a href="' + ctlink + '"> (more)</a><br><br>');
    }
    else
    {
    comment = comment.substring(0, 150);
    var quoteEnd = comment.lastIndexOf(" ");
    comment = comment.substring(0, quoteEnd);
    document.write(comment + '...<a href="' + ctlink + '"> (more)</a><br><br>');
    }
    }
    document.write('</li>');
    }
    </script>
    <script src="http://bloggerfaqs.blogspot.com/feeds/comments/default?alt=json-in-script&callback=showrecentcomments">
    </script></ul>
  5. Save the widget and see your blog for changes.

Widget Customization


You need to replace http://bloggerfaqs.blogspot.com/ with your own blog address. You can further make customization by changing the value 20 to some higher or lower value. This value is for the number of comments and you can't have more than 25 comments. Last thing you can modify is font-style: italic; which you can change to font-style: bold; or font-style: normal; to change the font styling.

Tuesday, July 14, 2009

Blogspot How to: Add Social Bookmarking Icons in Blog Posts Footer


Social bookmarking services such as StumbleUpon, Digg & Reddit (->My love) are really popular these days & if a blog post makes it's way to the front page of these services then it's your lucky day. The concept is simple; people browsing web share their favorite bookmarks with others through these services. You can install these icons in your post footer so that your visitors can easily share a post.

Remember: Backup your template before moving on.


Steps to Add the Social Bookmarking Icons.


  1. Go to Layout | Edit HTML.
  2. Check Expand Widget Templates, the page will automatically refresh.
  3. After that press Ctrl + f and search for this code:
    <div class='post-body entry-content'>
    <data:post.body/>
    <div style='clear: both;'/> <!-- clear for photos floats -->
    </div>
  4. Now, place the following code right after the previous step code:
    <b:if cond='data:blog.pageType == &quot;item&quot;'>
    <big><big><big> Share this post! </big></big></big>
    <div class='spacer' style='margin-top:10px;margin-bottom:10px;border-top:solid 1px #DEDEDE;'/>
    <div class='social-table'>
    <table border='0' cellpadding='0' cellspacing='0' width='100%'>
    <tr>
    <td valign='top' width='50%'><table border='0' cellpadding='0' cellspacing='0' width='222'>
    <tr>
    <td height='24' width='24'><img border='0' height='16' src='http://lh3.ggpht.com/_TqPdHmAEwTM/SgxdHoRIprI/AAAAAAAAEC4/UOmW1Zfg04I/facebook.png' width='16'/></td>
    <td height='24'><a expr:href='&quot;http://www.facebook.com/share.php?u=&quot; +data:post.url'><strong>Share on Facebook</strong></a>
    </td>
    </tr>
    <tr>
    <td height='24'><img border='0' src='http://lh4.ggpht.com/_TqPdHmAEwTM/SgxdH2E0JsI/AAAAAAAAEDE/HTXaxE7_KaU/twitter.png'/></td>
    <td height='24'><a expr:href='&quot;http://twitthis.com/twit?url=&quot; + data:post.url + &quot;&amp;title=&quot; + data:post.title'><strong>Share on Twitter</strong></a>

    </td>
    </tr>
    <tr>
    <td height='24'><img border='0' height='16' src='http://lh3.ggpht.com/_TqPdHmAEwTM/SgxiZxfvTGI/AAAAAAAAEDU/AvuLyM_PGa4/stumble.png' width='16'/></td>
    <td height='24'><a expr:href='&quot;http://www.stumbleupon.com/submit?url=&quot; +data:post.url'><strong>Share on StumbleUpon</strong></a></td>
    </tr>
    <tr>
    <td height='24'><img border='0' height='16' src='http://lh6.ggpht.com/_TqPdHmAEwTM/Sgxdp40mQUI/AAAAAAAAEDM/_Nee9ul6zpc/s128/delicious.png' width='16'/></td>
    <td height='24'><a expr:href='&quot;http://del.icio.us/post?url&quot; +data:post.url'><strong>Share on Delicious </strong></a></td>
    </tr>
    <tr>
    <td height='24'><img border='0' height='16' src='http://lh4.ggpht.com/_TqPdHmAEwTM/SgxjIHpTaiI/AAAAAAAAEDY/pZtBL9woxzw/reddit.png' width='16'/></td>
    <td height='24'><strong><a expr:href='&quot;http://www.reddit.com/submit?url=&quot; +data:post.url'>Share on Reddit</a></strong>
    </td>

    </tr>
    </table></td>
    <td valign='top' width='50%'><table border='0' cellpadding='0' cellspacing='0' width='222'>
    <tr>
    <td height='24' width='24'><img border='0' height='16' src='http://lh4.ggpht.com/_TqPdHmAEwTM/SgxkjUlW8eI/AAAAAAAAEDc/iDE9H_-vX9w/digg.png' width='16'/></td>
    <td height='24'><a expr:href='&quot;http://digg.com/submit?phase=2&amp;url=&quot; + data:post.url + &quot;&amp;title=&quot; + data:post.title' target='_blank'><strong>Share on Digg </strong></a></td>
    </tr>
    <tr>
    <td height='24'><img border='0' height='16' src='http://lh5.ggpht.com/_TqPdHmAEwTM/Sgx1uAMIp7I/AAAAAAAAEDk/UvMj9nzDyJI/design_float.png' width='16'/></td>
    <td height='24'><a expr:href='&quot;http://www.designfloat.com/submit.php?url=&quot; +data:post.url'><strong>Share on DesignFloat</strong></a></td>
    </tr>
    <tr>
    <td height='24'><img border='0' height='16' src='http://lh4.ggpht.com/_TqPdHmAEwTM/Sgxdp80sUoI/AAAAAAAAEDQ/3eYyxtWAGpM/s128/technorati.png' width='16'/></td>
    <td height='24'><strong><a expr:href='&quot;http://technorati.com/faves/?add=&quot; +data:post.url'>Share on Technorati</a></strong></td>

    </tr>
    <tr>
    <td height='24'><img alt='Feeds RSS' border='0' height='16' src='http://lh5.ggpht.com/_TqPdHmAEwTM/SgxdH0I91sI/AAAAAAAAEDA/cDcvpz3WJug/feed.png' width='16'/></td>
    <td height='24'><a href='http://feeds2.feedburner.com/BloggerFAQs'><strong>Subscribe to Feeds RSS</strong></a>
    </td>
    </tr>
    </table></td>
    </tr>
    </table>
    </div>
    <div class='spacer' style='margin-top:10px;margin-bottom:10px;border-top:solid 1px #DEDEDE;margin-bottom:10px;'/>
    </b:if>
    <div style='clear: both; height:30px;'/>
  5. The only change you need to do in the above code is to replace http://feeds2.feedburner.com/BloggerFAQs with your blog feed URL.
  6. After that, save your template and you can see the icons in post footer but only on posts' pages.

Saturday, July 11, 2009

Blogger Templates: Paper Wall

Paper Wall Blogger Template

Sponsored by: Create a website - Create your own website in minutes. Free Trial.


Paper Wall is a beautiful Blogger template with 2 columns layout. It has a grungy look and awesome background design.

Features: grungy, premium, two columns, fixed width, search box, top menu, social networking icons, colorful.


Wednesday, July 8, 2009

How to Change Post Body Font Size, Color & Style

You can customize post body font in any expect like color, size, style or family. First, you should know what is the default CSS code for post body and then we'll customize it according to our own taste. Go to Layout | Edit HTML and find this code:

The default code of posts!


.post {
margin:.5em 0 1.5em;
border-bottom:1px dotted $bordercolor;
padding-bottom:1.5em;
}

Understand the default code!


1- margin:.5em 0 1.5em; is defining spacing between post and other elements in the blog like sidebar and header.

2- border-bottom:1px dotted $bordercolor; it very descriptive. It creates a dotted border at the bottom of the post with width 1px.

3- padding-bottom:1.5em; causes some space between posts and other elements at the bottom. The other elements could be labels, comments or date.

Make changes in the default code!


Now, I've given you some idea about the post body style definitions. By default, the font properties are not defined specifically for posts but we can easily do this by applying some simple CSS techniques.

1- How to change font size in post body!

You need to add font-size:15px; property in the default CSS code:

.post {
margin:.5em 0 1.5em;
border-bottom:1px dotted $bordercolor;
padding-bottom:1.5em;
font-size:15px;
}

Tip: Try increasing or decreasing 15px to increase or decrease font size.

2- How to change font color in post body!

You need to add color:#FFFFFF; in the default definitions:

.post {
margin:.5em 0 1.5em;
border-bottom:1px dotted $bordercolor;
padding-bottom:1.5em;
color:#FFFFFF;
}

Tip: #FFFFFF is the hex code for white color, you can capture any color you see on your computer or on web and get the hex code of that color through a free utility ColorPic.

Remember: This property will not effect hyperlinks (?) in the post body, I'll tell you about hyperlinks customization later in this article.

3- How to change the font family in post body!

Font family means that you can control which font will be used to display post body. You can have Arial, Times New Roman, Georgia, Serif and many many more. So, you'll need to apply font-family:"Times New Roman",Georgia,Serif; property for this purpose.

.post {
margin:.5em 0 1.5em;
border-bottom:1px dotted $bordercolor;
padding-bottom:1.5em;
font-family:"Times New Roman",Georgia,Serif;
}

Tip: I've added 3 fonts in font-family:"Times New Roman",Georgia,Serif; property, why? Because my user might not have Times New Roman installed on his/her computer then the second font Georgia will be used and similarly Serif can also be used.

Tip: See following article about CSS font family properties for information.

http://www.w3schools.com/css/pr_font_font-family.asp

4- How to change the style of post body font!

Remember: You might not need this property but this is useful for better understanding of your fonts.

By style, I mean you can make your font italic through font-style:italic; property.

.post {
margin:.5em 0 1.5em;
border-bottom:1px dotted $bordercolor;
padding-bottom:1.5em;
font-style:italic;
}

Remember: If you'll not add this property in default definitions then your post body font will be displayed normal.

Tip: Blogger post editor provides an easy way to make specific part of text italic. When creating a post, select your text and click the i icon which is the second icon on toolbar.

How to apply these properties on hyperlinks in the post body!


Some of the above described properties will not effect hyperlinks (?) in the post body and there are no definitions in default Blogger CSS for hyperlinks (?) so lets add our own definitions.

This is the deafault code:

.post {
margin:.5em 0 1.5em;
border-bottom:1px dotted $bordercolor;
padding-bottom:1.5em;
}

Add some more juice in it:

.post {
margin:.5em 0 1.5em;
border-bottom:1px dotted $bordercolor;
padding-bottom:1.5em;
}
.post a {
color:#FF0000;
text-decoration:underline;
text-transform:uppercase;
}

Now, I'll explain all 3 properties added in .post a {} tag.

1- color:#FF0000; is the hex code for red color, you can hex code of some other color to change it.

2- text-decoration:underline; will make your post hyperlinks (?) underlined, you can change this to text-decoration:none; if you don't want to apply it.

3- text-transform:uppercase; will change your hyperlinks (?) to transform to uppercase. You can change it to text-transform:lowercase; if you want your hyperlinks to display in lowercase or you can change it to text-transform:none; to nullify this effect.

How to customize the hyperlinks for mouse over event (hover effect)!


You can also further customize the font appearance when mouse comes over your hyperlinks. For example you might want to change the color of your hyperlinks on mouse over or make it underlined or maybe change the font size.

This is our default CSS + hyperlinks CSS we added in the previous steps:

.post {
margin:.5em 0 1.5em;
border-bottom:1px dotted $bordercolor;
padding-bottom:1.5em;
}
.post a {
color:#FF0000;
text-decoration:underline;
text-transform:uppercase;
}

Add even more juice in it:

.post {
margin:.5em 0 1.5em;
border-bottom:1px dotted $bordercolor;
padding-bottom:1.5em;
}
.post a {
color:#FF0000;
text-decoration:underline;
text-transform:uppercase;
}

.post a:hover {
color:#0000FF;
text-decoration:none;
text-transform:lowercase;
}

Now, I'll explain some changes I've made.

Note: All the properties in .post a:hover {} will be visible only when you'll move mouse over the link.

1- The color will change to blue (#0000FF).

2- There will be no decoration of text. Previously, we applied text-decoration:underline; property to make our hyperlinks underlined but when mouse will come over, it will not be underlined.

3- On mouse over, our hyperlinks will become lowercase.

Tip: "On mouse over" is called "hover effect" in CSS references.

Before you leave!


I've tried my best to share my knowledge with you, if this article has really helped you then you can comment or tell other people about it through social networking. Any question, comment or suggestion will be greatly appreciated, thanks.

Blogspot News: Track Blog Visitors With Live Traffic Stats

Keeping track of blog visitors is a must for every blogger. The most used tracking service is Google Analytics which is free. Some people also use Site Meter which is also free. Anyways, I've written tutorials to install both Google Analytics or Site Meter on a blog and track website visitors. Now, you don't need to install any external code to monitor traffic because Blogger-Blogspot has introduced built-in traffic stats for all blogs.

Wanna See Your Blog's Traffic Stats???


Whenever, Blogger-Blogspot adds a new feature, it is tested on a separate website called Blogger in Draft. As the stats feature is also just introduced so, you have to log in at http://draft.blogger.com/ rather than http://www.blogger.com/.
After logging in, open the 5th tab which is Stats tab. There you can see some very simple and basic information about your visitors.

Update!!!


This feature is now also available to everyone. Just log in and you'll see a new tab called Stats. The Stats tab contains interesting traffic statistics of the blog.

Blogspot SEO: Submit Your Blog to Google, Yahoo and Bing Search Engines

Search engines might take some time to discover and index your blog so, you can manually submit your blog to 3 major search engines Google, Yahoo and Bing. Don't submit links to multiple pages, just submit the URL/address of your blog homepage.

1- Submit your blog to Google


Open the following link and fill in your blog details. Google is king of internet so make sure to submit URL of all of your blogs.

http://www.google.com/addurl.html

2- Submit your blog to Yahoo


You can submit the URL of your blog or the RSS feed, both are accepted by Yahoo. Although Yahoo has far less search traffic than Google but people coming from Yahoo search stay longer on a blog.

http://siteexplorer.search.yahoo.com/submit

3- Submit your blog to Microsoft Bing


Bing is the latest effort from Microsoft in search engine war. It might get a decent chunk in search engine traffic in the near future. Anyways, here is the link.

http://www.bing.com/webmaster/SubmitSitePage.aspx

What About Less Popular Search Engines???


Some lesser known search engines like Alta Vista and Lycos use other search engines like Yahoo and Google to power their search, so don't worry about submitting your blog to them.

Tip: Make sure you also submit your blog sitemap to Google (?). It's quick, easy and free way to enhance your blog traffic.

Install Google Analytics to Track Blog Visitors

Google Analytics is a free product that tracks your website and gives detailed statistics about visitors to your website. For example, Analytics can show you how people found your site, how they explored it, and how you can enhance their visitor experience. With this information, you can improve your website return on investment, increase conversions, and make more money on the web. To install Google Analytics on Blogger, you need to follow these steps:

1- Go to https://www.google.com/analytics/reporting/login?ctu=https://www.google.com/analytics/settings/%3Fet%3Dreset%26hl%3Den and sign in with your Google Account.

Info: You can sign in with your Blogger account, that is also a Google Account.

2- Now you've signed in but you have to configure settings, so Google Analytics will ask you to sign up so click on that button.


How to Install Google Analytics on Blogger


3- On the next page, you'll be asked to enter some General Information of your website. First, you'll need to add your blog URL like I've added mine here:


How to Install Google Analytics on Blogger


Warning: Don't add http:// because that is already included.

4- Now enter an Account Name (whatever you like), your Time zone country or territory and Time zone of your area and click Continue to proceed.

5- Now, you need to add your Contact Information. Fill all the boxes and click Continue to go to the next step.

6- We're almost done now you need to Accept User Agreement by checking the box located at the bottom of this huge agreement.


How to Install Google Analytics on Blogger


7- Now, your Google Analytics account is created and you need to add the Tracking Code on your website. You'll see that there are two tracking codes available but you need to copy the New Tracking Code (ga.js) because it has more features than the other.


How to Install Google Analytics on Blogger


8- Once you've copied that code click Finish and come back to your Blogger account and go to Layout | Edit HTML section.

Remember: You need to add this code in that blog which you've added in step 3.

9-
In Edit HTML section, search (Ctrl+f) for </body> tag and paste the code right before this tag.


How to Install Google Analytics on Blogger


10- Click on Save Template button to save your template.

11- Your Tracking Code is now installed and you'll receive first stats almost after 24 hours.

12- To see these reports, you need to sign in to your Analytics Account and click on View Reports link. Once you're viewing reports, there are many graphs and links representing different stats. Google Analytics Official Help provides a simple tutorial to understand the stats.

How to Understand the Google Analytics Stats? (Courtesy: Google Analytics Help)

Here is a detailed view and tutorial of Google Analytics Dashboard:


How to Install Google Analytics on Blogger


and here is the detail:

1. Click this link to navigate back to your Analytics Settings page, so you can get an overview of and edit all your Analytics accounts and profiles. From there, you can navigate to the Profile Settings page, where you can view your tracking code, and create goals and funnels.

2. You can also navigate to any account using this pull-down menu.

3. The 'Settings' page is different from the “Analytics Settings” page. Here, you can set the email address associated to your account, your account language, and your email notifications settings.

4. The 'My Account' link takes you to a page listing all your Google Accounts.
Learn more about Google Accounts settings page.

5. Click here to go to our Google Analytics Help Center. It searches over 30,000 pages of Google Analytics support content from the Help Center, Google Analytics Help Group, and the web.

6. Always remember to sign out of your account when you’re done!

7. Visitors
This section provides information on visitor interaction with your site, the type of visitors, and information about how they are viewing your site.

* Benchmarking, Map Overlay, New vs. Returning, Languages, Visitor Trending, Visitor Loyalty, Browser Capabilities, Network Properties, User defined

8. Traffic Sources
Find out how different offline or online sources sent traffic to your site. View which sources are driving the most traffic to your site and spot trends from the provided graphs and charts.

* Overview, Direct Traffic, Referring Sites, Search Engines, All Traffic Sources, Keywords, AdWords (lists AdWords-specific information like AdWords Campaigns and Keyword Positions), Campaigns, Ad Versions

9. Content
These reports are all about the pages in your site and how visitors interacted with each one. Use the data here to find time on page, landing and exit page information, and a navigation summary for pages. Another free Google product, Website Optimizer, has been useful for advertisers looking to increase conversions by testing different versions of their content. You can learn more about it here.

* Overview, Top Content, Content by Title, Content Drilldown, Top Landing Pages, Top Exit Pages, Site Overlay, Site Search, Event Tracking (in Beta)

10. Goals
If you’ve set goals for your Analytics account, then you should see data in these reports.
Learn how to set up goals and funnels .

* Overview, Total Conversions, Conversion Rate, Goal Verification, Reverse Goal Path, Goal Abandoned Funnels, Funnel Visualization

11. Ecommerce
For Ecommerce site owners, these reports give extremely helpful information on the revenue, transaction, and ecommerce activity on a site. There’s a whole section on product performance to view your top-selling product, right down to the SKU number.

* Overview, Total Revenue, Conversion Rate, Average Order Value, Product Performance (Product Overview, Product SKUs, Categories), Transactions, Visits to Purchase, Days to Purchase

12. Design a custom report using the metrics and dimensions you want to see. For more information, please read our Quick Start Guide.

13. Settings – Advanced Segments and Email
Advanced Segmentation: Slice and dice your data in the way you want to see them. Click ‘Advanced Segments’ to create these segments and apply them to your reports. Read through our tutorial and view our video on this powerful feature here.
Email: Manage scheduled email reports. In order to learn how to modify them, please read this article.

14. Click on any of these help resources to get information on the specific report you’re viewing, tips on how to interpret and use the information for your campaign, or learn what other people’s common questions are.

15. Select from this pull-down menu to jump to another Analytics account.

16. Apply the advanced segment you created to a report and compare it side-by-side to other graphs. See number 13 to learn more about advanced segments

17. Select a date range through a calendar or timeline slider to graph your report data by clicking on the arrow. You also have the option compare to past data in this section. Instructions on how to use this feature can be found here.

18. Graph your report by day, week, month, or hour (where available). Learn more.

19. The selected date range, graph by view, advanced segment or metric is viewed as a graph here.

20. Get at-a-glance views of your account’s key metrics here.

21. Add or delete report snapshot modules to your dashboard. To add a module, go to your desired report and click ‘Add to dashboard’ at the top of your report. To delete one, click the ‘X’ on the upper right-hand corner of every module in your Dashboard report.

How to Add Image as Blog Background

We can easily add a background image in a Blogger/Blogspot blog. To add an image as your blog background, first of all you need to do 3 things:

1- Select an image.
2- Upload it.
3- Add it to your blog HTML.

1- Select an Image


This is a fairly simple thing, you can either chose an image wallpaper from your computer or web. Of course, if you're selecting a full wallpaper then it will be quite heavy in size and eventually your blog will take too much time to load.

I recommend you to use a pattern instead of a large image. A pattern is also an image but it has a very small size and it is repeated in the blog background. We can use it to cover whole background through a CSS background property which will be explained later.

Tip: Go to Din Patterns to download high quality patterns for your blog background.

2- Upload it


I assume that you've already selected an image or a pattern and now we need to upload it on some image host. Fortunately, Blogger provides each user 1Gb free space to store images which is more than enough, so just upload your image on Blogger and then come back.

How to Host Images on Blogger

3- Add it to your blog HTML


I'm assuming that now you've completed the previous two steps and we're ready to move on. Now, you need to follow these simple steps to complete this tutorial:

1- Go to Design -> Edit HTML and find:

body {
background:$bgcolor;
margin:0;
color:$textcolor;
font:x-small Georgia Serif;
font-size/* */:/**/small;
font-size: /**/small;
text-align: center;
}


You might not be able to find the exact above code but you'll definitely find some code of this form:

body {
.
.
.
Some Code Here
.
.
.
}


2- Once you've found the above mentioned code, you need to add following code in it:

background-image:url(URL of your image from step 2);
background-repeat: repeat;
background-attachment: fixed;


Please note that this code is only for adding a pattern, if you're adding a large image, please see the heading Aligning Background Image later in this tutorial otherwise continue from here. After adding the code mentioned in Step 2, overall code should look something like this:

body {
background:$bgcolor;
margin:0;
color:$textcolor;
font:x-small Georgia Serif;
font-size/* */:/**/small;
font-size: /**/small;
text-align: center;
background-image:url(URL of your image from step 2);
background-repeat:repeat;
background-attachment: fixed;

}


3- Replace URL of your image from step 2 with your uploaded image URL which you uploaded above in this tutorial.

4- You can also try changing background-attachment: fixed; to background-attachment: scroll;. This way, your background will also move when you scroll your blog but I won't recommend doing this.

Aligning Background Image


If you've added a background image (not pattern) then it's very important to align it correctly. Here is the code to add an image in the background:

background-image:url(URL of your image from step 2);
background-repeat: no-repeat;
background-attachment: fixed;
background-position: left top;


Overall, the code should look something like this:

body {
background:$bgcolor;
margin:0;
color:$textcolor;
font:x-small Georgia Serif;
font-size/* */:/**/small;
font-size: /**/small;
text-align: center;
background-image:url(URL of your image from step 2);
background-repeat: no-repeat;
background-attachment: fixed;
background-position: left top;
}


As you can see, I've changed the code a bit by changing repeat to no-repeat and also adding Background Position property. The no-repeat will make sure that our image doesn't repeat itself. The Background Position property has 2 parameters which define horizontal and vertical positioning of an image. In the above code, horizontal position is left and vertical position is Top so our image will be placed according to these parameters. Here is a list of possible parameters of Background Position property.

background-position: left top;
background-position: left center;
background-position: left bottom;

background-position: right top;
background-position: right center;
background-position: right bottom;

background-position: center top;
background-position: center center;
background-position: center bottom;


Final Thoughts


People love personalizing their blogs and adding an image in blog background surely adds more personalization in a blog. This is the most famous tutorial on Beta Templates and I'm thankful to you guys for that.

How to Post Large High Quality Images


By default, Blogger decreases the size and quality of an image in the post. We can make some modifications in the uploaded image code to retain the quality.

Upload an Image as usual


I've uploaded an image from my computer with width 515px and height 402px. When the image was uploaded, the width and height both have decreased resulting in a smaller image. This is how the image looks like:

How to Post Large High Quality Images

And this is the code:


<a onblur="try {parent.deselectBloggerImageGracefully();} catch(e) {}" href="https://blogger.googleusercontent.com/img/b/R29vZ2xl/AVvXsEhrrx7IyWDlcQBI7KM_mb95UnhDSNuV717rdE8L5RU35MK0Hcr6cvpxPsD9G6XyrcFC9B-XTcNzyo0LZty_Vo3e6XABv7boOfPvp2JUHbpzbTtMVOay-wlSj1rzk6yW53p8j8pcnGs5dAc/s1600-h/add+recent+comments+widget+for+blogger+2.PNG"><img style="margin: 0px auto 10px; display: block; text-align: center; cursor: pointer; width: 400px; height: 312px;" src="https://blogger.googleusercontent.com/img/b/R29vZ2xl/AVvXsEhrrx7IyWDlcQBI7KM_mb95UnhDSNuV717rdE8L5RU35MK0Hcr6cvpxPsD9G6XyrcFC9B-XTcNzyo0LZty_Vo3e6XABv7boOfPvp2JUHbpzbTtMVOay-wlSj1rzk6yW53p8j8pcnGs5dAc/s400/add+recent+comments+widget+for+blogger+2.PNG" alt="" id="BLOGGER_PHOTO_ID_5352758256344287250" border="0" /></a>


Note: You can see the code only in Edit HTML mode of the post editor. You can find this mode at the top right of the editor.


As you can see from the image code that width is now 400px (original 515px) and height is 312px (original 402px). To fix this problem, take a closer look at the image code. There are two URLs in this code, one is for larger size (s1600-h) and the other is for smaller size (s400). That's why when you click on an image, the same image opens up in full size.

Let's do some good changes in the code


The trick you'll apply here is to replace the smaller image URL with the larger image URL which means replacing the address of smaller image:


https://blogger.googleusercontent.com/img/b/R29vZ2xl/AVvXsEhrrx7IyWDlcQBI7KM_mb95UnhDSNuV717rdE8L5RU35MK0Hcr6cvpxPsD9G6XyrcFC9B-XTcNzyo0LZty_Vo3e6XABv7boOfPvp2JUHbpzbTtMVOay-wlSj1rzk6yW53p8j8pcnGs5dAc/s400/add+recent+comments+widget+for+blogger+2.PNG


with the address of larger image:


https://blogger.googleusercontent.com/img/b/R29vZ2xl/AVvXsEhrrx7IyWDlcQBI7KM_mb95UnhDSNuV717rdE8L5RU35MK0Hcr6cvpxPsD9G6XyrcFC9B-XTcNzyo0LZty_Vo3e6XABv7boOfPvp2JUHbpzbTtMVOay-wlSj1rzk6yW53p8j8pcnGs5dAc/s1600-h/add+recent+comments+widget+for+blogger+2.PNG


After these changes, the image code should look like this:


<a onblur="try {parent.deselectBloggerImageGracefully();} catch(e) {}" href="https://blogger.googleusercontent.com/img/b/R29vZ2xl/AVvXsEhrrx7IyWDlcQBI7KM_mb95UnhDSNuV717rdE8L5RU35MK0Hcr6cvpxPsD9G6XyrcFC9B-XTcNzyo0LZty_Vo3e6XABv7boOfPvp2JUHbpzbTtMVOay-wlSj1rzk6yW53p8j8pcnGs5dAc/s1600-h/add+recent+comments+widget+for+blogger+2.PNG"><img style="margin: 0px auto 10px; display: block; text-align: center; cursor: pointer; width: 400px; height: 312px;" src="https://blogger.googleusercontent.com/img/b/R29vZ2xl/AVvXsEhrrx7IyWDlcQBI7KM_mb95UnhDSNuV717rdE8L5RU35MK0Hcr6cvpxPsD9G6XyrcFC9B-XTcNzyo0LZty_Vo3e6XABv7boOfPvp2JUHbpzbTtMVOay-wlSj1rzk6yW53p8j8pcnGs5dAc/s1600-h/add+recent+comments+widget+for+blogger+2.PNG" alt="" id="BLOGGER_PHOTO_ID_5352758256344287250" border="0" /></a>


You need to do two more things here to make image original size. Delete s1600-h from image source URL. If s1600-h is not present, proceed with tutorial. The code should now look like this:


<a onblur="try {parent.deselectBloggerImageGracefully();} catch(e) {}" href="https://blogger.googleusercontent.com/img/b/R29vZ2xl/AVvXsEhrrx7IyWDlcQBI7KM_mb95UnhDSNuV717rdE8L5RU35MK0Hcr6cvpxPsD9G6XyrcFC9B-XTcNzyo0LZty_Vo3e6XABv7boOfPvp2JUHbpzbTtMVOay-wlSj1rzk6yW53p8j8pcnGs5dAc/s1600-h/add+recent+comments+widget+for+blogger+2.PNG"><img style="margin: 0px auto 10px; display: block; text-align: center; cursor: pointer; width: 400px; height: 312px;" src="https://blogger.googleusercontent.com/img/b/R29vZ2xl/AVvXsEhrrx7IyWDlcQBI7KM_mb95UnhDSNuV717rdE8L5RU35MK0Hcr6cvpxPsD9G6XyrcFC9B-XTcNzyo0LZty_Vo3e6XABv7boOfPvp2JUHbpzbTtMVOay-wlSj1rzk6yW53p8j8pcnGs5dAc/+recent+comments+widget+for+blogger+2.PNG" alt="" id="BLOGGER_PHOTO_ID_5352758256344287250" border="0" /></a>


Last thing you need to do is to change width and height to that of original image.


<a onblur="try {parent.deselectBloggerImageGracefully();} catch(e) {}" href="https://blogger.googleusercontent.com/img/b/R29vZ2xl/AVvXsEhrrx7IyWDlcQBI7KM_mb95UnhDSNuV717rdE8L5RU35MK0Hcr6cvpxPsD9G6XyrcFC9B-XTcNzyo0LZty_Vo3e6XABv7boOfPvp2JUHbpzbTtMVOay-wlSj1rzk6yW53p8j8pcnGs5dAc/s1600-h/add+recent+comments+widget+for+blogger+2.PNG"><img style="margin: 0px auto 10px; display: block; text-align: center; cursor: pointer; width: 515px; height: 402px;" src="https://blogger.googleusercontent.com/img/b/R29vZ2xl/AVvXsEhrrx7IyWDlcQBI7KM_mb95UnhDSNuV717rdE8L5RU35MK0Hcr6cvpxPsD9G6XyrcFC9B-XTcNzyo0LZty_Vo3e6XABv7boOfPvp2JUHbpzbTtMVOay-wlSj1rzk6yW53p8j8pcnGs5dAc/s1600-h/add+recent+comments+widget+for+blogger+2.PNG" alt="" id="BLOGGER_PHOTO_ID_5352758256344287250" border="0" /></a>


Now, our image looks like this:


Just to clarify the difference, here is the originally uploaded image:


Be careful when posting large images


You can't use image of any width in your template because a template has specific width allowed for posting area. An image with too much width can be problematic and without proper CSS definitions, the image might overlap sidebar.

To avoid this, you can create a scroll bar around your image which will make sure that the image will never be cut off or overlap due to size. The format of this property is like this:


<div style="overflow:auto;">
YOUR IMAGE CODE COMES HERE
</div>


For example, I can use the code of my uploaded image here like this:


<div style="overflow:auto;">
<a onblur="try {parent.deselectBloggerImageGracefully();} catch(e) {}" href="https://blogger.googleusercontent.com/img/b/R29vZ2xl/AVvXsEhrrx7IyWDlcQBI7KM_mb95UnhDSNuV717rdE8L5RU35MK0Hcr6cvpxPsD9G6XyrcFC9B-XTcNzyo0LZty_Vo3e6XABv7boOfPvp2JUHbpzbTtMVOay-wlSj1rzk6yW53p8j8pcnGs5dAc/s1600-h/add+recent+comments+widget+for+blogger+2.PNG"><img style="margin: 0px auto 10px; display: block; text-align: center; cursor: pointer; width: 515px; height: 402px;" src="https://blogger.googleusercontent.com/img/b/R29vZ2xl/AVvXsEhrrx7IyWDlcQBI7KM_mb95UnhDSNuV717rdE8L5RU35MK0Hcr6cvpxPsD9G6XyrcFC9B-XTcNzyo0LZty_Vo3e6XABv7boOfPvp2JUHbpzbTtMVOay-wlSj1rzk6yW53p8j8pcnGs5dAc/s1600-h/add+recent+comments+widget+for+blogger+2.PNG" alt="" id="BLOGGER_PHOTO_ID_5352758256344287250" border="0" /></a>
</div>


Tip: Whenever you use a large image (width above 550px), you should use the overflow property. Don't worry if the image is small in width, it will not create a scroll bar.


Although, the best method to post large images is to increase the width of the template posting area. You can ask for that if you want to.

Blogspot How to: Host Images on Blogger

Why Should I Upload Images on Blogger???


Image hosting sites like Photobucket & TinyPic have a bandwidth limit. Which means if your uploaded image is viewed too many times then a ridiculous notification will appear instead of your images. So, avoid using such services. Blogger provides 1Gb of free space to every user for images and that's more than enough.

This is why I hate Photobucket!


Photobucket bandwidth exceeded image

Steps to upload your images on Blogger!


To use Blogger as your image host, follow these steps:

1- Log in to your Blogger account click New Post button to create a new post.

Blogspot Tip: It doesn't matter if you have one or multiple blogs, you can create a new post in any of your blogs.

2- In the new post make sure you're working in Edit HTML mode.

3- Now click on the Add Image icon to upload your image.

4- A new small window will open to upload your image or images (maximum 5 at a time).


5- You can either upload images from your computer or give URL of some other picture to add to your post. I'm uploading an image from my computer by clicking the browse button and giving image location on the hard drive. Make sure to chose Large as image size!

6- Once your image is uploaded, you'll see some code like this in the post editor:

<a onblur="try {parent.deselectBloggerImageGracefully();} catch(e) {}" href="https://blogger.googleusercontent.com/img/b/R29vZ2xl/AVvXsEjd8qYsqXvsagea6tbfFTX2n_Fvx2qcezpqyuf4GkC34nV2RKAT_KYam7Jt9SBjWGJzw_iG7lGnddd1gpzLephJJgmdj7QFwsxfhdXB9qKSxXIKC5dM4DSWZEmIbi6vLsN6UwEqDy37VjM/s1600/add+new+picture+window.PNG"><img style="cursor:pointer; cursor:hand;width: 400px; height: 262px;" src="https://blogger.googleusercontent.com/img/b/R29vZ2xl/AVvXsEjd8qYsqXvsagea6tbfFTX2n_Fvx2qcezpqyuf4GkC34nV2RKAT_KYam7Jt9SBjWGJzw_iG7lGnddd1gpzLephJJgmdj7QFwsxfhdXB9qKSxXIKC5dM4DSWZEmIbi6vLsN6UwEqDy37VjM/s400/add+new+picture+window.PNG" border="0" alt=""id="BLOGGER_PHOTO_ID_5351602214730857826" /></a>

7- There are two image URLs in the above picture code, one is the source of the image (Green) and the other (Blue) is the URL to which the image is linked.

Note: As you can see that the source image URL is linked to itself which means that when you'll click on this image, the same image will be opened on the same page.

8- We've nothing to do with the URL of the source image (Green), all we need to do is to copy the other (Blue) URL and use it wherever we want to use.

9- So, this is the URL or address of our uploaded image:

https://blogger.googleusercontent.com/img/b/R29vZ2xl/AVvXsEjd8qYsqXvsagea6tbfFTX2n_Fvx2qcezpqyuf4GkC34nV2RKAT_KYam7Jt9SBjWGJzw_iG7lGnddd1gpzLephJJgmdj7QFwsxfhdXB9qKSxXIKC5dM4DSWZEmIbi6vLsN6UwEqDy37VjM/s1600/add+new+picture+window.PNG

10- Use it wherever you want. You can also delete the post after uploading your images but I'll recommend you to save it as a Draft because you might need the URLs of the uploaded images again in the future.

Update!


If you guys are unable to upload on Blogger then there is a great alternative out there, imgur. Uploading an image there is incredibly easy and quick.

How to Submit Your Blog to Google

Just a while ago, I wrote an article to get your site indexed by Google by using Google Webmaster Tools. If you quickly want to add your URL to Google then you'll need to follow these simple steps.

1- Go to the following address:

http://www.google.com/addurl/?continue=/addurl

2- Fill in the boxes with your URL and optional comments.

3- That's it you've submitted your URL to Google.

Tip: Please see the "Submit Your Blog Sitemap to Google Through Google Webmaster Tools" for better submission.

Blogspot How to: Submit Blog Sitemap to Google via Google Webmaster Tools

Google controls 85% of the global search and any blog is heavily dependent on traffic from search result. We must make sure that all the posts or pages of our blog are indexed by Google. We can submit a blog sitemap to Google through Google Webmaster Tools. Google can then use this sitemap to quickly index all the entries of a blog.

This tutorial is also available in video format on my YouTube channel:
http://www.youtube.com/user/BloggerEngineer


Where is the Sitemap of My Blogger/Blogspot Blog?


In very simple words, a sitemap is a large single web page containing all of your posts and labels. Blogger/Blogspot users can submit their feed as a sitemap to Google. All Blogger/Blogspot blogs have a feed address of this form:

http://www.bloggerfaqs.blogspot.com/feeds/posts/default

The above feed can display only last 25 blog posts. Most blogs have more than 25 posts so we must make sure that all the posts should get indexed. To do that, we can change the above code to:

http://www.bloggerfaqs.blogspot.com/feeds/posts/default?max-results=500

Now, last 500 posts will be shown in the feed. Now, we have a sitemap & we're ready to submit it to Google through Google Webmaster Tools.

Open Google Webmaster Tools


Google Webmaster Tools provides you with detailed reports about your pages' visibility on Google. To get started, simply add and verify your site and you'll start to see information right away.

1- Go to the following address and sign in with your Google account:

http://www.google.com/webmasters/

2- Click on Add a Site button to add your blog.

3- A small box will appear, enter your blog URL in it.

4- Now you need to prove that you are the owner of this blog, for this you need to verify.

5- Chose Meta Tag as verification method and copy the tag which looks something like this:

<meta name="verify-v1" content="z6MLWEMxLvMFcoVNvGPKOMvAn1oJBKem+eTEpZ1F/DU=">

6- Now come back to your Blogger account and go to Design -> Edit HTML section.

7- Paste the Meta Tag right after <head> tag, the <head> tag is in the start of your code just after a few lines.

8- Once you've pasted the code, click on Save Template button to save your changes.

9- Now again go to you Webmaster Tools account and click on verify button to complete verification process.

10- If you've done everything right, you'll see that you're site is verified now.

Warning: Don't remove the Meta Tag after verification process, it might be checked again.

11- Now, you'll see a list of verified sites (I suppose you'll see only 1 site there) on your Google Webmaster Tools homepage.

12- Click on your site and you'll see a dashboard page of that site.

13- From the menu on the left side, expand the Site configuration option and then click Sitemaps.

14- On the next page, click Submit a Sitemap button and it will ask you to enter the sitemap of your blog. The address of your blog will be already there so you just have to add the remaining part which is:

feeds/posts/default?max-results=500

Overall the code would look something like this:

http://www.bloggerfaqs.blogspot.com/feeds/posts/default?max-results=500

So just submit the sitemap there and Google will take some time (Typically, less than 24 hours) to index the contents of your sitemap.

Final Thoughts


Many readers complain that there blog doesn't appear in search results even after getting indexed. Please note that getting indexed doesn't guarantee that you're blog will also appear in search results for a specific keyword. Just use natural post and blog titles, publish new posts regularly and engage with readers to get decent traffic from Google.

How to Backup or Download a Blogger Blogspot Template

It is very important that you regularly backup your template layout. You can easily download your exiting layout and restore it if anything goes wrong during experiment or when applying a tutorial.

Blogspot How To: Change Post Title Color in Blogger Template Designer Templates


Steps to Backup your Blogger/Blogspot Template


Step 1. Go to Design -> Edit HTML tab.


Step 2. Click on Download Full Template link.

Blogspot How to: Backup/Restore Your Blogger/Blogspot Template

Step 3. Save the .XML template file on your hard drive.

Tip: Whenever I download my template file, I rename it to the current date which makes it easy to find.

Tip: Whenever you work in Edit HTML section, make sure you always first download your template for backup.

Steps to Restore Your Blogger/Blogspot Template


Step 1. Go to Design -> Edit HTML tab.


Step 2. Click the browse button, select the backup template from your hard drive and upload it.

Blogspot How to: Backup/Restore Your Blogger/Blogspot Template

Blogspot Hack: Leave Title Field Blank in Blogger Gadgets

Since the introduction of new Blogger Template Designer, many people have complained about a problem. Blogger no longer allows you to leave the Title field of blank. This is true for any widget/gadget. So, here is a very simple way to trick Blogger and leave the Title field blank.

Blank Title Field in Blogger Gadgets


How to Create a Gadget with Blank Title Field!


Blogger widget titles use h2 heading tags so, whenever you create a new gadget, simply put the following code in the Title field:

<h2></h2>

You will not receive any error and the Title will remain blank. That's it!

Monday, July 6, 2009

Blogspot Tutorial: Add a Stylish Blog Search Engine


You can add a colorful search engine to your blog with ease. Many people prefer to have a simple search engine but you can customize it to suit your taste or your blog outlook. Lets have a look at a simple search engine and then we will customize it.

A simple blog search engine


The code for this search engine is:


<form id="searchThis" action="/search" style="display: inline;" method="get"><input id="searchBox" style="width: 200px;" value="Enter something here..." name="q" onclick="this.value=''" type="text"/><input id="searchButton" value="Search!" type="submit"/></form>


You can change two things in this simple search engine. One is value="Search!" where you can replace Search! with some other word like Go!. You can also replace value="Enter something here..." with some other line which will appear in the search box.

Customize this simple search engine to make it stylish and cool


Now, we have seen a simple search engine lets customize it by changing its width, height, colors & font size.


I've used two colors (black & white) to customize the outlook of our simple search engine and it's looking cool, lets have a look at its code and then we'll further customize it.


<form id="searchThis" action="/search" style="display: inline;" method="get"><input id="searchBox" style="width: 150px; height: 15px; color: #FFFFFF; font-size: 14px; background-color: #000000;" value="Enter text to search..." name="q" onclick="this.value=''" type="text"/><input id="searchButton" style="border-color: #000000; background-color: #FFFFFF; color: #000000;" value="Submit!" type="submit"/></form>


Now, I'll explain styling used in this search engine.

Width


width: 150px; is defining width of this search engine, you can change it to a higher value for more width. Like if I change it width: 150px; to width: 200px; this is the result...


Height


height: 15px; is defining height, you can change also change it to another number like when I changed height: 15px; to height: 20px; this happened...


Color


color: #FFFFFF; is for white color. You can certainly have another color by entering it's hex code and if you don't know about hex codes then simple download ColorPic which is a free color capturing utility.

I changed the color: #FFFFFF; to color: #FFD900; which is kinda orange color and this is the result...


Font Size


font-size: 14px; is for font size in px. I changed it to a lower value 10px just to show you the effect...


Background Color of Search Box


background-color: #000000; is for background color of the search box (not of button). Lets change it to background-color: #FF0000; which is for red color and see what happens.


Border Color


Next things is the styling of our search button. border-color: #000000; is the border color of our search button, change it to border-color: #FF0000; and see the result...


Background Color of Search Button


background-color: #FFFFFF; is the background color of the search button, change it to #FFFF00 (yellow) and see what happens...


Search Button Text Color


Last thing is color: #000000; which is the color of search button text, lets change it to #0000FF (blue) and the result is...


Installing this search engine in your blog


You can install this engine after all the customization in your sidebar by going to Layout | Page Elements and on your sidebar click Add a Gadget link. From the new opened window chose HTML/JavaSrcipt gadget and in the Title field write a title as you wish and in the Content area, add the code of your search engine. Click Save and enjoy.

Blogspot Tutorial: How to Write a Post in Blogger Compose Mode


When you're logged in to Blogger and you already have created a blog, you'll see a NEW POST icon under every blog, click on that icon and you'll be taken to an other page where you can create a post. This area is your Post Editor. and it has two modes i.e. Edit HTML and Compose. Our topic is all about Compose mode.

This is an overall look of the Blogger post editor (Compose mode).

A Dummies Guide to Compose Mode

What to do if you can't see a Compose mode option in the post editor!


If you're unable to see a Compose mode option in the post editor then you need to see a setting. Go to your Blogger Dashboard | Settings | Basic and scroll down to second last option which is Show Compose Mode for all your blogs?. Make sure this option is seleted Yes and then click on SAVE SETTINGS at the bottom of the page.

The Title field in Compose mode!


When you're creating a post, the first thing you'll work with is your post title. Please be careful and enter a relevant title in this field because this is a critical component to search engines. I'm writing this tutorial on Compose mode, so, my title is "A Dummies Guide to Compose Mode" which is pretty relevant.

A Dummies Guide to Compose Mode

The toolbar with a lot of icons!


Toolbar is really our biggest help in Blogger Compose mode. It contains a lot of tools that will make our life easier. Move your cursor on any of these icons to see what they do. Let's start discussing these tools one by one...

A Dummies Guide to Compose Mode

1- Font


Blogger offers 8 different fonts which can be added to beautify our post. You just need to select the text which font you want to change and then select the font from the drop down menu. This fonts are:

1- Arial
2- Courier
3- Georgia
4- Lucida Grande
5- Times
6- Trebuchet
7- Verdana
8- Webdings

2- Font size


Second tool in our toolbar is about font size. We can select a text to and select it's size from this tool.

1- Smallest
2- Small
3- Normal
4- Large
5- Largest

3- Bold & Italic


These tool will simply make your selected text bold or italic.

4- Text Color


You can change your text to any color through this tool, it's really amazing and easy. Make sure you don't do any stupid things with this tool like your post background color is black and you're making your post text dark.

5- Link


This is maybe the most important tool and is used extensively. You might want to link to someone else' blog or some other site in your post then you can simple type in the name of that blog or site and click this tool, it will prompt you to enter a URL and you need to enter the URL (address) of that blog or site which you want to link.

For example, I want to link "Blogger" to "http://www.blogger.com/", so I'll type Blogger and press the Link tool and enter the URL (http://www.blogger.com/) and this is the result, click to see: Blogger

I would recommend you to read "Creating and Using Links in Blogger" for further information.

6- Align Left, Align Center, Align Right & Justify Full


When writing poems, these tools are really helpful to align your text like I'm writing some lines of a poem here with different alignments.

Be glad your nose is on your face,
not pasted on some other place,
for if it were where it is not,
you might dislike your nose a lot.
(Align Left)


Be glad your nose is on your face,
not pasted on some other place,
for if it were where it is not,
you might dislike your nose a lot.
(Align Center)


Be glad your nose is on your face,
not pasted on some other place,
for if it were where it is not,
you might dislike your nose a lot.
(Align Right)


Be glad your nose is on your face,
not pasted on some other place,
for if it were where it is not,
you might dislike your nose a lot.
(Justify Full)

7- Numbered List, Bulleted List & Blockquote


These tools are helpful to create lists. Numbered List will, of course, create lists with numbers like 1, 2, 3, 4 and so on. Bulleted List will not create numbers and it will only use some bullets to create lists.

Blockquote is a very rarely used tool. Select some text and click on Blockquote tool, your text alignment will change and it will be more distinguishable (easily recognizable) than the remaining text. This tool inserts a space before and after the selected text and also creates margin between selected and unselected text.

8- Check Spelling


It will check spelling mistakes in your post.

9- Add Image


This tool will help you to add images in your post from your computer or from the internet. Clicking this tool will cause a pop-up window to appear like this..

A Dummies Guide to Compose Mode


You can click Browse button to upload an image from your computer or you can directly enter an image URL (http://www.sample.com/sample.jpg) from the internet to include images in post. You can also select alignment of your image (None, Left, Center, Right) and upload size (Small, Medium, Large). If you check the Use this layout every time? option then you don't need to adjust the size and alignment of your images again and again.

I would recommend you to always chose Large as your image upload size and don't use image URLs from the internet to upload instead you can always upload image from your own computer. Blogger gives every one 1 GB free space for images, use it. See these articles on images:

How to Use Blogger for Uploading or Hosting Images

and

How to Post Large Images

10- Add Video


This tool will upload a video from your computer with maximum upload size of 100 MB.

A Dummies Guide to Compose Mode

11- Remove Formatting from selection


This is an awesome tool, it's like Undo tool we found in many many applications. Imagine you've selected a text and changed it's color but after some time you want to remove that color then simply selected the color text and click Remove Formatting from selection tool and see what happens.

Preview link


This link will show you a preview of your post i.e. how it will look like when you'll publish it online.

Post body


Post body is the central part of our discussion. Whatever we do, appears here, in a big white box under our toolbar. In the picture, the post body is highlighted in orange color.

A Dummies Guide to Compose Mode

Post Options Link


You need to click this link at the bottom to see what it contains. You can manage Reader Comments, Backlinks and Post date and time of every post through this link.

A Dummies Guide to Compose Mode

Labels for this post: & Show all link


You can also set categories for each post, in terms of Blogger categories are labels. For example I'm writing about this article about Blogger basics, so, my labels could be "Blogger Basics", "Basics", "Blogger Compose Mode" and so on.

PUBLISH POST & SAVE NOW buttons


The PUBLISH POST button will simple publish your post to the world of internet and SAVE NOW can save your post progress specially when you're writing long posts. However, Blogger automatically saves the post after regular intervals.