Tuesday, June 16, 2009

Blogspot Tutorial: Add a Twitter Retweet Button in Posts

How to Add a Twitter Retweet Button in Blogger-Blogspot Posts
You can easily add retweet buttons on your Blogger-Blogspot blog. Such buttons allow blog readers to share content on Twitter with others. When people will tweet about your blog, you'll get free marketing and traffic for your blog.

Whoa! We Can Use 2 Buttons Here!


Yes, we can add 2 different type of buttons provided by different sites. twitthis isn't very popular but tweetMeme is really shining out there. Anyways, both buttons will do same thing so it depends on your choice.

Add twitThis Twitter Retweet Button


Add Tweetthis Button in Your Blogger Posts to Get Massive Traffic

To add twitthis Twitter button, follow the following steps:

1- Go to Design and then Edit HTML tab.

2- Check Expand Widget Templates.

3- Find this tiny piece of code:

<b:if cond='data:post.title'>

4- Add following code just before the previous line of code:

<div style='float:right; margin-left:14px;'>
<a expr:href='&quot;http://twitthis.com/twit?url=&quot; + data:post.url + &quot;&amp;title=&quot; + data:post.title'><img alt='TweetThis Button' border='0' src='https://blogger.googleusercontent.com/img/b/R29vZ2xl/AVvXsEjLBoVLbbqjNpO6YVIDBXOSCGsxnowLwHFRRDQIVu0jxdRKh-wjCelrmHVT3W4XGWl5ABn5NaW2zv81jgsOU3vmsfRECPDm4E-P3MshyYwlSCr1gwpcP7_ahSTh7C2jxY8uRS94PawyVYg/s1600/Twitter.gif'/></a>
</div>


5- Now, we have added our button just below the posts, so save the template and see the result.

Add tweetmeem Twitter Retweet Button


Add Tweetthis Button in Your Blogger Posts to Get Massive Traffic
Adding tweetmeme Twitter Retweet button is also very easy. Just follow all the steps of twitthis Twitter Retweet button but the code to add in step 4 will be this:

<div style='float:right; margin-left:14px;'>
<script type='text/javascript'>
tweetmeme_url = &#39;<data:post.url/>&#39;;
</script>
<script src='http://tweetmeme.com/i/scripts/button.js' type='text/javascript'/>
</div>

Wanna Add Some More Such Buttons?


I've also written tutorials to add StumbleUpon button, many social bookmarking buttons and Facebook Share button. Feel free to check them out!

Sunday, June 14, 2009

How to Add Your Own Image as Blog Background in the Template Designer

Add Your Own Image As Background in the Template Designer

The most special thing about Blogger-Blogspot is personalization and ease of use. People love to have a personal image as their blog background. You can see my previous tutorial which makes it fairly easy to add an image as blog background in the older Blogger-Blogspot templates (also called layouts). Now, you can design your very own templates with the new Template Designer. But you can't add your own image as background without knowing HTML and CSS. So, in this tutorial, I'll try to make it very simple to add your own image as blog background.

Things to Do in This Tutorial


So, we need to do 3 different things in this tutorial which are:

1- Select an image from your computer or web.
2- Upload your image on Blogger-Blogspot.
3- Add the uploaded image as blog background.

1- Select an Image From Your Computer or Web.


First of all you've to select an image either from web or your computer. If you like some image on the web then it is better to save that image on your computer. If you've a professional blog then go for a pattern (Download Patterns) as background otherwise personal bloggers might wanna add their personal image as blog background.

2- Upload Your Image on Blogger-Blogspot.


The most convenient way to upload an image on web is to upload it to your Blogger-Blogspot blog. Blogger provides each user 1gb free space so use it. Here is a tutorial to upload your images on Blogger:

How to Host Images on Blogger

After uploading your image on Blogger-Blogspot, make sure to copy the address/URL of your uploaded image because that will be used later.

3- Add the Uploaded Image as Blog Background.


I'm assuming that you've uploaded your image and you've the address/URL of your uploaded image. Now go to Design then Template Designer. From the left column select Advanced and then chose Write CSS. You can click the following image for help:


In the box there, we can add our custom CSS code. So, you need to add the following code in that white box:

body { background: url(URL of Image you uploaded in step 2); background-color: none; }
.body-fauxcolumn-outer div { background: none !important; }


If you're using a pattern then the above code will work great. However, if you're using a big image then you need to take care of the alignment as well. The code for an image will be something like this:

body { background: url(URL of Image you uploaded in step 2) no-repeat scroll top left; background-color: none; }
.body-fauxcolumn-outer div { background: none !important; }


There are 4 things in the code above, let me introduce them to you.

1- no-repeat


It makes sure that the large image doesn't repeat itself. You can change it to repeat if you want to repeat your background image.

2- scroll


You might have noticed that the background image also moves when you scroll down your blog. If you want the background image to stay still in the background then you can change scroll to fixed.

3- top


Top is indicating the vertical positioning of the background image. You can change the vertical positioning to center or bottom.

4- left


Left is responsible for horizontal positioning of your background image. You can also change this value to center or right.

Final Thoughts


I've tried my best to make the HTML and CSS stuff easy for you guys. however, if you still feel any difficulty, feel free to leave me a comment. You can also refer to an official tutorial provided by Google about adding custom CSS in Template Designer.

Saturday, June 13, 2009

10 Most Popular Blogger (Blogspot) Templates

10 Most Popular Blogger-Blogspot Templates

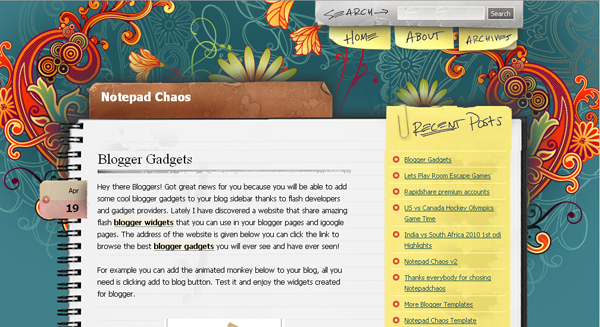
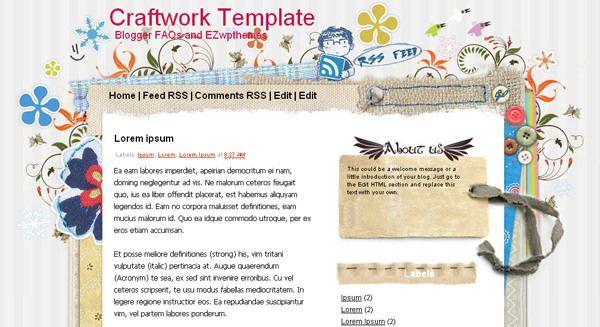
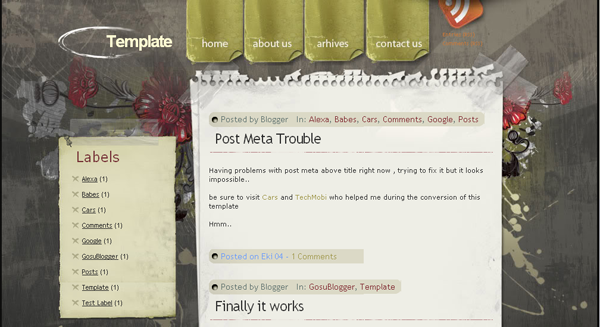
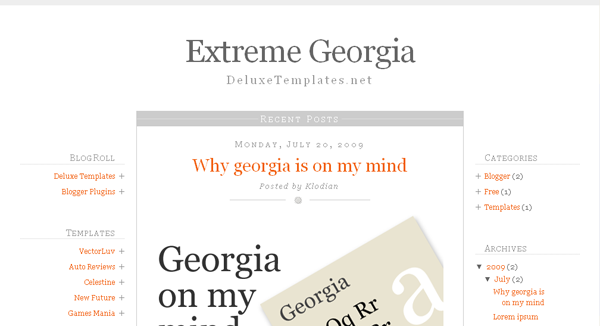
People are doing amazing thing with Blogger-Blogspot these days. One of them is to convert Wordpress themes to Blogger-Blogspot with full compatibility. I've compiled a list of most popular Blogger-Blogspot templates. Check it out and feel free to add your suggestion as well.

1- Notepad Chaos


Notepad Chaos Blogger-Blogspot Templates
Notepad Chaos was originally designed by Evan Eckard and released by Smashing Magazine as a free Wordpress theme. A Turkish blogger, Gosu, converted it to Blogger-Blogspot. Notepad Chaos theme has a vibrant & colorful background which makes it a master piece.

2- Craftwork


Craftwork Blogger-Blogspot Templates
Craftwork was originally released as a free Wordpress theme by EZwpthemes. I converted it to Blogger-Blogspot and since then it is driving huge traffic to my blog. It is the most viewed, downloaded and commented template on Beta Templates.

3- Creative Art


Creative Art Blogger-Blogspot Templates
Creative Art is also converted to Blogger-Blogspot by Gosu. It has amazing combination of grunge and notepaper design which makes it an eye candy. It was designed by FTL and released by Smashing Magazine as a free Wordpress theme.

4- Extreme Georgia


Extreme Georgia Blogger-Blogspot Templates
Smashing Magazine organized a typographic layout competition and Extreme Georgia was ranked 2nd in that contest. It was originally designed by MentariWorks and converted to Blogger-Blogspot by Klodian at Deluxe Templates. It is a clean and minimal template with 2 column layout.

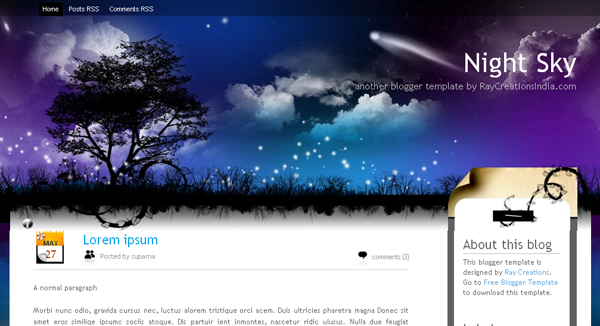
5- Night Sky


Kids Style Blogger-Blogspot Templates
Night Sky is an original Blogger-Blogspot template. It is created by an Indian web design agency Ray Creations. They have also released Night Sky 2.0, make sure to check that out too.

6- Smash My Typo


Smash My Typo Blogger-Blogspot Templates
Smash My Typo was originally created as a typographic layout by Alexander Dahlberg for Smashing Magazine's typographic design contest. I converted it to Blogger-Blogspot after so many requests from readers.

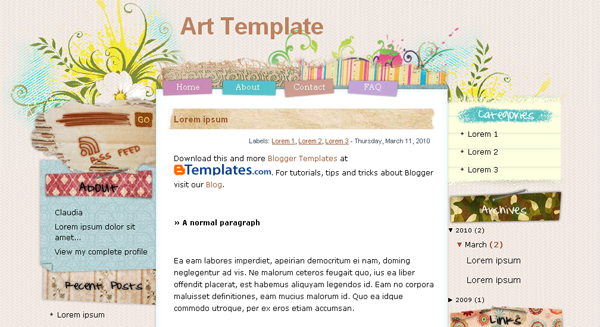
7- Art Template


Art Template Blogger-Blogspot Templates
Art Template is a very beautiful Blogger-Blogspot template created by EZwpthemes and converted to Blogger-Blogspot by Gosu. The template features a stylish background and widgets.

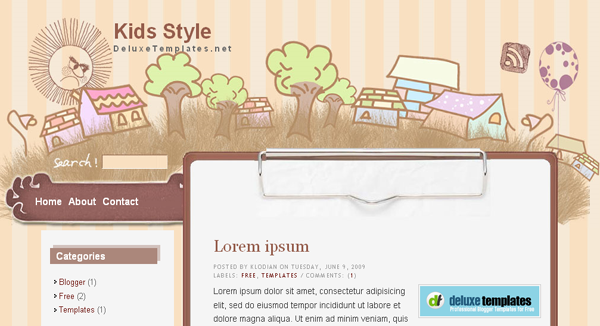
8- Kids Style


Kids Style Blogger-Blogspot Templates
Kids Style is a very cute Blogger-Blogspot template. It was originally designed by EZwpthemes and converted to Blogger-Blogspot by Klodian.

9- Water Color


Water Color Blogger-Blogspot Templates
Water Color is colorful and vibrant Blogger-Blogspot template with bright and grungy background. It was converted to Blogger-Blogspot by Alvaris Falcon and deigned by TemplateLite.

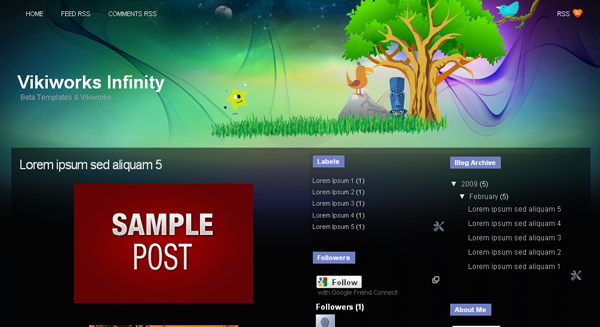
10- Infinity


Infinity Blogger-Blogspot Templates
Infinity is simply gorgeous Blogger-Blogspot template. It was also released by Smashing Magazine as a free Wordpress theme and I've converted it to Blogger-Blogspot. The theme is a creation of Vikiwords Studio from China.

Final Thoughts


I'm sure that there are much more beautiful Blogger-Blogspot templates out there. Such lists can't be perfect but we can appreciate the hard work of designers and coders. Blogger has just released a Blogger Template Designer so we might see lesser use of custom templates in the future.

Wednesday, June 10, 2009

Blogger Template Designer For Beginners

Blogger Template Designer for Dummies
Some days ago, Blogger announced a new feature Template Designer through which users can easily design and customize layouts. The Template Designer was only available as a beta feature to Blogger in Draft users. From today, this awesome feature is available to everyone. Just log in to your Blogger account and you'll see a new option Design on your dashboard. In this guide, I'll try to explain everything you need to know about the Blogger Template Designer.

Where is Blogger Template Designer?


Just log in to your Blogger account. From your dashboard, go to Design and then open the Template Designer tab. Now, we can start designing a template.

Start Using Blogger Template Designer


So, the Template Designer has 4 sub sections. Now, I'll explain each of them seperately.

1- Templates Tab


Blogger has initially provided 5 templates to chose from. Each template has it's own flavors with different color schemes. You can chose any template and start editing.

2- Background Tab


In this section, you can chose from thousands of background images. People just love background images. The images are provided by iStockphoto and are nicely divided into categories. Template Designer also suggests some nice color schemes which could be helpful.

3- Layout Tab


Layout section is the heart of new Template Designer. Just think, how difficult it was, for a non-technical person, to add another column in the template or change the width of the blog. Now, all of this is changed thanks to the Template Designer. You can chose the layout of your blog from Body layout tab. Footer layout tab lets you easily chose the footer layout like 3 columns footer. And you can change the width of body, sidebars & columns from Adjust width tab.

4- Advanced Tab


Do you remember the Fonts & Colors tab which lets you change the colors and fonts of your blog? Same function is performed in Advanced tab. It is so easy and real-time because you can preview every change.

What About Custom Blogger/Blogspot Templates?


I think, now it is time to stop using custom Blogger templates which are ususally converted from Wordpress. Custom Blogger/Blogspot templates are very unfriendly to non-technical people. Often people complain that their blog looks awful in old browsers like Internet Explorer 6. Blogger is the easiest way to get yourself online and it's continously improving. Don't pay anyone for anything related to Blogger/Blogspot. Now, you can easily customize every aspect of a Blogger/Blogspot blog. Blogger/Blogspot is designed for non-technical people so feel free to give it a try.

What's Next?


I can't wait to see awesome designs coming up with the Template Designer. You can easily change everything without any technical knowledge. Of course, every change can be viewed in real time. If you've customized your blog with the Template Designer, feel free to leave your blog address in the comments.

How to Remove Header Borders in Minima Blogger Template

How to Remove Header Borders in Blogspot/Blogger

This is a really quick and easy trick. Whenever, someone creates a new blog, Blogger automatically chooses Minima Blogger Template by default. I really love this minimal template but the border lines around header doesn't make any sense. So, in this tutorial, Ill tell you how you can very easily remove the border lines around header.

Steps to Remove Borders Around Header/Title


1- Just go to Layout and then Edit HTML tab.

2- Find this code:

#header-wrapper {
width:660px;
margin:0 auto 10px;
border:1px solid $bordercolor;
}

#header-inner {
background-position: center;
margin-left: auto;
margin-right: auto;
}

#header {
margin: 5px;
border: 1px solid $bordercolor;
text-align: center;
color:$pagetitlecolor;
}


3- Delete the two lines from the above code which are border: 1px solid $bordercolor; and again border:1px solid $bordercolor;. After that, the code should look something like this:

#header-wrapper {
width:660px;
margin:0 auto 10px;
}

#header-inner {
background-position: center;
margin-left: auto;
margin-right: auto;
}

#header {
margin: 5px;
text-align: center;
color:$pagetitlecolor;
}


4- Preview your template and save if happy with the results.

Sunday, June 7, 2009

What Are Custom Fonts & How to Use Google Custom Fonts in Your Blog

Add Beautiful Fonts in Blogger Blogs Using Google Fonts

Google has recently launched a new service which lets you easily use amazing fonts in any blog. These fonts are powered by JavaScript code which is hosted by Google so you don't have to worry about it. Currently, only 18 fonts are available but we can expect that number to grow. For example, this text is written in Lobster font. These fonts are search engine friendly and work in all browsers.

How to Add Google Fonts in Blogger Blogs


Google has made it really easy for anyone to embed a font in the blog. Just follow these steps:

1- Go to Google Font Directory.

2- Select a font from the list there, I'm using Lobster web font by Pablo Impallari.

3- On the next page, click Get the code link.

4- You'll see some code which looks something like this:

<link href='http://fonts.googleapis.com/css?family=Lobster' rel='stylesheet' type='text/css'>

Note:
This is the code we need but when I copied and used this code in Blogger, an error occurred. To deal with the error, you have to close the link tag by adding /(slash) right before > in the above code and it would look something like this:

<link href='http://fonts.googleapis.com/css?family=Lobster' rel='stylesheet' type='text/css'/>

So, whichever font you use, just add a / before > in the code of that font. For now, copy the above code and go to your Blogger account.

5- Go to Design then Edit HTML tab and find </head>. After that, paste the step 4 code right before </head> tag. The result would look something like this:

<link href='http://fonts.googleapis.com/css?family=Lobster' rel='stylesheet' type='text/css'/>
</head>


After adding the code, save your template.

6- Now, we can use this font in headings and text. For example, if you want to use the web font in posts then use some code like this:

<span style="font-family: Lobster;">Any text here will be displayed by a web font like Lobster in this tutorial.</span>

How to Use Google Fonts in Posts/Sidebar/Header Headings?


You can also use the embedded web font in any heading of the blog. All templates have different structure that's why I can't write about each and every template. You can post your blog address in the comments and tell me in which part of the blog you want to use an embedded web font. I'll try to reply as soon as possible, thanks.

Thursday, June 4, 2009

How to Add Facebook Share Button in Blogger/Blogspot Posts

Add Facebook Share Button in Blogger Posts

Social media sites like Facebook & Twitter could be great source of quality traffic for any blog. You can also add a Facebook share button in each of your posts. This button will allow users to quickly share a post on Facebook.

Steps to Add Facebook Share Button Below Post Title


To add Facebook share button below post title, simply follow these steps:

  1. Back up your layout/template.
  2. Go to Layout then Edit HTML tab.
  3. Check Expand Widget Templates. The page will automatically refresh.
  4. Now find this code:
    <data:post.body/>
  5. Place the following code right before the code found in step 4:
    <!-- Facebook Button -->
    <div style='float: left; padding: 5px; '>
    <a expr:share_url='data:post.url' name='fb_share' rel='nofollow' type='TYPE OF BUTTON'/>
    <script src='http://static.ak.fbcdn.net/connect.php/js/FB.Share' type='text/javascript'/>
    </div>
    <!-- Facebook Button -->

    The result should look something like this:
    <!-- Facebook Button -->
    <div style='float: left; padding: 5px; '>
    <a expr:share_url='data:post.url' name='fb_share' rel='nofollow' type='TYPE OF BUTTON'/>
    <script src='http://static.ak.fbcdn.net/connect.php/js/FB.Share' type='text/javascript'/>
    </div>
    <!-- Facebook Button -->
    <data:post.body/>
  6. Click Preview button to see the result and then save your template.

Add Facebook Share Button Below Post Body


To place the Facebook share button under each post, you have to follow the exact steps given above but step 5 is a little changed.

5- Place the following code right below the code found in step 4:
<!-- Facebook Button -->
<div style='float: left; padding: 5px; '>
<a expr:share_url='data:post.url' name='fb_share' rel='nofollow' type='TYPE OF BUTTON'/>
<script src='http://static.ak.fbcdn.net/connect.php/js/FB.Share' type='text/javascript'/>
</div>
<!-- Facebook Button -->

The result would look something like this:
<data:post.body/>
<!-- Facebook Button -->
<div style='float: left; padding: 5px; '>
<a expr:share_url='data:post.url' name='fb_share' rel='nofollow' type='TYPE OF BUTTON'/>
<script src='http://static.ak.fbcdn.net/connect.php/js/FB.Share' type='text/javascript'/>
</div>
<!-- Facebook Button -->

Button Modifications


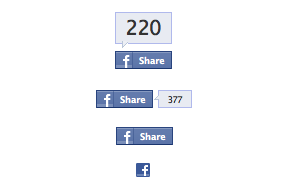
You can also change the button type like adding a counter with the button. All you need is to replace TYPE OF BUTTON from the above code with:

button for a button like this:


button_count for a button like this:


box_count for a button like this:


icon for a button like this: