Showing posts with label Tutorials. Show all posts

Friday, May 18, 2012

How to Check Your Blogger Template Name


Ever wondered which template you are using? Well, it is pretty simple to know. In this tutorial, I'll tell you how to check the Blogger template of your blog. By default, Blogger offers 6 awesome templates including Simple, Awesome Inc., Picture Window, Ethereal, Watermark & Travel. Follow the steps to check your template.

  1. Open the Template section.
  2. Blogger Updated Dashboard
  3. Click the Edit HTML button.
  4. Blogger Edit HTML Button
  5. A new window will open. Click the Proceed button.
  6. Now, you'll see a lot of code. Just scroll down a bit and you'll see some code like this:
  7. -----------------------------------------------
    Blogger Template Style
    Name: Simple
    Designer: Josh Peterson
    URL: www.noaesthetic.com
    -----------------------------------------------
  8. From this code, you can easily see the name of the template. In the example, the template is "Simple". After that you can easily do editing or follow some tutorial. Click the following image for details:

Sunday, January 22, 2012

How to Enable Threaded Comments in Customized Blogger-Blogspot Templates


Blogger-Blogspot has recently introduced much-awaited feature of threaded commenting. Now, users can reply to a comment and the comment owner will get an email notification. Naturally, I was also excited about it so, I enabled this feature on my heavily customized template. But it didn't work. I was lucky enough to have an old backup file of Simple Blogger-Blogspot template. After doing some coding, I found it quite easy to integrate the threaded comments in the Simple Blogger-Blogspot template. Please note that this is not a properly tested tutorial. Your template might have different codes. So, follow the steps carefully.


Note: This tutorial doesn't work for most of the people, so please email me your template. I'll manually edit and return to you in a week. Here is my email:
levisinside0@gmail.com


Steps to Enable Threaded Comments in Blogger-Blogspot


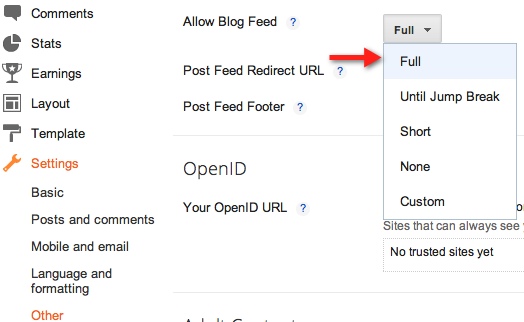
  1. First of all make sure that your blog feed is set to Full. You can confirm that by going to Settings > Other and then selecting Full from the Allow Blog Feed dropdown.
  2. You must also have embedded comment form enabled. Check that by going to Settings > Posts and Comments and check the Comment Location dropdown.
  3. After that, open the Template section.
  4. Blogger Updated Dashboard
  5. Warning: Backup your current template before moving on.
  6. Click the Edit HTML button.
  7. Blogger Edit HTML Button
  8. A new window will open. You'd have to click the Proceed button to start editing.
  9. Blogger Proceed Button
  10. Check Expand Widget Templates option.
  11. Find the following line of code:
    <b:includable id='postQuickEdit' var='post'>
  12. Once you've found the above line, you'll see this piece of code:
    </div>
    </div>
    </div>
    </b:includable>
    <b:includable id='postQuickEdit' var='post'>
    Now, we need to add some code just BEFORE the above code. The code to add is:
    <b:if cond='data:blog.pageType == &quot;static_page&quot;'>
    <b:if cond='data:post.showThreadedComments'>
    <b:include data='post' name='threaded_comments'/>
    <b:else/>
    <b:include data='post' name='comments'/>
    </b:if>
    </b:if>
    <b:if cond='data:blog.pageType == &quot;item&quot;'>
    <b:if cond='data:post.showThreadedComments'>
    <b:include data='post' name='threaded_comments'/>
    <b:else/>
    <b:include data='post' name='comments'/>
    </b:if>
    </b:if>
    After adding the new code, overall code should look like this:
    <b:if cond='data:blog.pageType == &quot;static_page&quot;'>
    <b:if cond='data:post.showThreadedComments'>
    <b:include data='post' name='threaded_comments'/>
    <b:else/>
    <b:include data='post' name='comments'/>
    </b:if>
    </b:if>
    <b:if cond='data:blog.pageType == &quot;item&quot;'>
    <b:if cond='data:post.showThreadedComments'>
    <b:include data='post' name='threaded_comments'/>
    <b:else/>
    <b:include data='post' name='comments'/>
    </b:if>
    </b:if>
    </div>
    </div>
    </div>
    </b:includable>
    <b:includable id='postQuickEdit' var='post'>
  13. Now, we need to find the following piece of code:
    <div class='post-outer'>
    <b:include data='post' name='post'/>
    <b:if cond='data:blog.pageType == &quot;static_page&quot;'>
    <b:include data='post' name='comments'/>
    </b:if>
    <b:if cond='data:blog.pageType == &quot;item&quot;'>
    <b:include data='post' name='comments'/>
    </b:if>
    </div>
    and REPLACE the above code with the following one:
    <div class='post-outer'>
    <b:include data='post' name='post'/>
    <b:if cond='data:blog.pageType == &quot;static_page&quot;'>
    <b:if cond='data:post.showThreadedComments'>
    <b:include data='post' name='threaded_comments'/>
    <b:else/>
    <b:include data='post' name='comments'/>
    </b:if>
    </b:if>
    <b:if cond='data:blog.pageType == &quot;item&quot;'>
    <b:if cond='data:post.showThreadedComments'>
    <b:include data='post' name='threaded_comments'/>
    <b:else/>
    <b:include data='post' name='comments'/>
    </b:if>
    </b:if>
    </div>

  14. Click Save template and then Close button.


  15. Blogger-Blogspot Save Template Close Buttons
  16. Check your blog. If you can see the option of Reply under each comment then threaded commenting is enabled. Otherwise, upload your backup template.


Saturday, December 17, 2011

How to Change Post Title Background Color in Blogger-Blogspot Templates

A reader emailed me and asked about changing the post title background color, so here it is. In this tutorial I'll tell you how to change the post title background color in Blogspot templates. As usual, we'll do some editing in the template's HTML code and after that, you'll be able to change the post background color from Blogger Template Designer. So, here are the simple steps to follow:

Note: These instructions are according to the updated Blogger-Blogspot interface.

Steps to Change Post Title Background Color

  1. Open the Template section.
  2. Blogger Updated Dashboard
  3. Click the Edit HTML button.
  4. Blogger Edit HTML Button
  5. A new window will open. You'd have to click the Proceed button to start editing.
  6. Blogger Proceed Button
  7. Find the following code:
    /* Variable definitions
    ====================
    Replace the above code with the following one:
    /* Variable definitions
    ====================

    <Group description="Post Title Background Color" selector="h3.post-title">
    <Variable name="post.title.bg.color" description="Title Background Color" type="color" default="#222222" value="#eeeeee"/>
    <Variable name="post.title.bg.hover.color" description="Title Hover Background Color" type="color" default="#222222" value="#000000"/>
    </Group>
  8. Save your template and move on the next step.


  9. Now this step is a little different for each Blogger-Blogspot template. So, please follow the instruction according to the template you're using.

    1. For Simple Blogger-Blogspot template, find the following code:
      h3.post-title, .comments h4 {
      font: $(post.title.font);
      margin: .75em 0 0;
      }
      and replace it with the following one:
      h3.post-title, .comments h4 {
      font: $(post.title.font);
      margin: .75em 0 0;
      }

      h3.post-title a, h3.post-title a:visited { background:$(post.title.bg.color); }
      h3.post-title a:hover { background:$(post.title.bg.hover.color); }
    2. For Picture Window Blogger-Blogspot template, find the following code:
      h3.post-title {
      margin: 0;
      font: $(post.title.font);
      }
      and replace it with the following one:
      h3.post-title {
      margin: 0;
      font: $(post.title.font);
      }

      h3.post-title a, h3.post-title a:visited { background:$(post.title.bg.color); }
      h3.post-title a:hover { background:$(post.title.bg.hover.color); }
    3. For Awesome Inc & Ethereal Blogger-Blogspot templates, find the following code:
      h3.post-title, h4 {
      font: $(post.title.font);
      color: $(post.title.text.color);
      }
      and replace it with the following one:
      h3.post-title, h4 {
      font: $(post.title.font);
      color: $(post.title.text.color);
      }

      h3.post-title a, h3.post-title a:visited { background:$(post.title.bg.color); }
      h3.post-title a:hover { background:$(post.title.bg.hover.color); }
    4. For Watermark Blogger-Blogspot template, find the following code:
      h3.post-title {
      font: $(post.title.font);
      margin: 0;
      }
      and replace it with the following one:
      h3.post-title {
      font: $(post.title.font);
      margin: 0;
      }

      h3.post-title a, h3.post-title a:visited { background:$(post.title.bg.color); }
      h3.post-title a:hover { background:$(post.title.bg.hover.color); }
    5. For Travel Blogger-Blogspot template, find the following code:
      h3.post-title {
      margin-top: 20px;
      }
      and replace it with the following one:
      h3.post-title {
      margin-top: 20px;
      }

      h3.post-title a, h3.post-title a:visited { background:$(post.title.bg.color); }
      h3.post-title a:hover { background:$(post.title.bg.hover.color); }


  10. Coding is finished. Save your template.


Lets Change the Post Title Background Color in Template Designer

We've done the coding work. Now, you can simply open the Blogger-Blogspot Template Designer and customize the post title background color.
To open Template Designer, click Customize button. In Template Designer, select Advanced from the left menu. You'll see the Post Title Background Color option at the top. Here, you can preview your changes live. Please note that the change in Title Hover Background Color will not appear in Preview window. You can simply apply these changes to your blog and enjoy :)

Wednesday, October 5, 2011

How to Add Background Color to Sidebar Widget Titles


A reader has requested this tutorial to add background color to sidebar titles. By default, Blogger only allows to change the font & color of sidebar widget titles. So, I'll try to make it as simple as possible & you'll be able to change the background color from the Template Designer.

Can I Apply This Tutorial on Any Template?


Currently, you can apply this tutorial only on 'Simple' Blogger template. If you're using any other Blogger template or custom template, please be careful.

Steps!


  1. Open the Template section.
  2. Blogger Updated Dashboard
  3. Click the Edit HTML button.
  4. Blogger Edit HTML Button
  5. A new window will open. You'd have to click the Proceed button to start editing.
  6. Blogger Proceed Button
  7. Find the following code:
       <Group description="Gadgets" selector="h2">
    <Variable name="widget.title.font" description="Title Font" type="font"
    default="normal bold 11px Arial, Tahoma, Helvetica, FreeSans, sans-serif" value="normal bold 11px Arial, Tahoma, Helvetica, FreeSans, sans-serif"/>
    <Variable name="widget.title.text.color" description="Title Color" type="color" default="#000000" value="#000000"/>
    <Variable name="widget.alternate.text.color" description="Alternate Color" type="color" default="#999999" value="#999999"/>
    </Group>

    REPLACE the above code with the following one:
       <Group description="Gadgets" selector="h2">
    <Variable name="widget.title.font" description="Title Font" type="font"
    default="normal bold 11px Arial, Tahoma, Helvetica, FreeSans, sans-serif" value="normal bold 11px Arial, Tahoma, Helvetica, FreeSans, sans-serif"/>
    <Variable name="widget.title.text.color" description="Title Color" type="color" default="#000000" value="#000000"/>
    <Variable name="widget.title.bg.color" description="Title Background Color" type="color" default="#999999" value="#999999"/>
    </Group>
  8. After that, find the following code:
    h2 {
    margin: 0 0 1em 0;

    font: $(widget.title.font);
    color: $(widget.title.text.color);
    text-transform: uppercase;
    }

    REPLACE the above code with the following code:
    h2 {
    margin: 0 0 1em 0;
    background: $(widget.title.bg.color);
    font: $(widget.title.font);
    color: $(widget.title.text.color);
    text-transform: uppercase;
    }

  9. In this step, find this code:
    .widget .zippy {
    color: $(widget.alternate.text.color);
    text-shadow: 2px 2px 1px rgba(0, 0, 0, .1);
    }
    REPLACE the above code with the following one:
    .widget .zippy {
    text-shadow: 2px 2px 1px rgba(0, 0, 0, .1);
    }

  10. The background color of sidebar widget titles is also applied to the date above posts. So, we need to do a little more coding. Find the following code:
    .date-header span {
    background-color: $(date.header.background.color);
    color: $(date.header.color);
    padding: $(date.header.padding);
    letter-spacing: $(date.header.letterspacing);
    margin: $(date.header.margin);
    }

    REPLACE the above code with the following one:
    .date-header span {
    color: $(date.header.color);
    padding: $(date.header.padding);
    letter-spacing: $(date.header.letterspacing);
    margin: $(date.header.margin);
    }

    h2.date-header {background:$(date.header.background.color);}

  11. Click Save template and then Close button.

  12. Blogger Save Template Close Buttons

Change Widget Title Background Color in Blogger Template Designer


After finishing the tutorial, you can easily change the background from Blogger Template Designer. Open 'Template Designer' & select 'Advanced' from the left. Then select 'Gadgets' and you'll see the option to change background of the sidebar widget titles.

Saturday, August 6, 2011

How To Change Post Title Color in Picture Window Blogspot Template

By default, there is no option to change post title color in Blogger Designer Templates. I've already written a tutorial to do that but users of Picture Window template are having problems. Here is a tutorial to change post title color in Picture Window template.

Note: If you're using other templates then see this tutorial:
Blogspot How To: Change Post Title Color in Blogger-Blogspot Template Designer Templates

Steps to Change Post Title Color in Picture Window Template


  1. Open the Template section.
  2. Blogger Updated Dashboard
  3. Click the Edit HTML button.
  4. Blogger Edit HTML Button
  5. A new window will open. You'd have to click the Proceed button to start editing.
  6. Blogger Proceed Button
  7. Find the following code:
       <Group description="Post Title" selector="h3.post-title, .comments h4">
    <Variable name="post.title.font" description="Title Font" type="font"
    default="normal normal 18px Arial, Tahoma, Helvetica, FreeSans, sans-serif" value="normal normal 18px Arial, Tahoma, Helvetica, FreeSans, sans-serif"/>
    </Group>

    Tip: You can press 'Ctrl + f' keys or simply scroll down the HTML a bit to find the code.

  8. Replace the previous code with the following code:
       <Group description="Post Title" selector="h3.post-title, .comments h4">
    <Variable name="post.title.font" description="Title Font" type="font"
    default="normal normal 18px Arial, Tahoma, Helvetica, FreeSans, sans-serif" value="normal normal 18px Arial, Tahoma, Helvetica, FreeSans, sans-serif"/>
    <Variable name="post.title.color" description="Color" type="color" default="#FE6602" value="#FE6602"/>
    <Variable name="post.title.hover.color" description="Hover Color" type="color" default="#FFD25F" value="#FFD25F"/>
    </Group>
  9. Now find this code:
    h3.post-title {
    margin: 0;
    font: $(post.title.font);
    }
  10. Replace the above code with this code:
    h3.post-title {
    margin: 0;
    font: $(post.title.font);
    color: $(post.title.color);
    }

    h3.post-title a {
    color: $(post.title.color);
    }

    h3.post-title a:hover {
    color: $(post.title.hover.color);
    }
  11. Click Save template and then Close button.
  12. Blogger Save Template Close Buttons
  13. Now go to Template Designer then Advanced and edit the Post Title option.


  14. You can simply edit the post color and post hover color from here.
  15. Enjoy!

Thursday, April 7, 2011

How to Change Sidebar Background Color in Blogger Templates

Hi guys, writing a tutorial after a long time. Anyway, here is a simple tutorial to change the sidebar background color in new Blogger Template Designer templates. After this tutorial, you can easily change the sidebar background color from Template Designer.

Update: I've updated this tutorial. Now you can change the sidebar background color in every Blogger template. Templates with multiple sidebars can also have different colors for each sidebar.


Steps!


  1. Open the Template section.
  2. Blogger Updated Dashboard
  3. Click the Edit HTML button.
  4. Blogger Edit HTML Button
  5. A new window will open. You'd have to click the Proceed button to start editing.
  6. Blogger Proceed Button
  7. Find the following code:
    /* Variable definitions
    ====================
  8. REPLACE the above code with the following one:
    /* Variable definitions
    ====================

    <Group description="Right Sidebar Background" selector="body">
    <Variable name="sidebar.right.top.color" description="Right Top Sidebar Background" type="color" default="#00f" value="#0000ff"/>
    <Variable name="sidebar.right.left.color" description="Right Left Sidebar Background" type="color" default="#ff0" value="#ffff00"/>
    <Variable name="sidebar.right.right.color" description="Right Right Sidebar Background" type="color" default="#f0f" value="#ff00ff"/>
    </Group>

    <Group description="Left Sidebar Background" selector="body">
    <Variable name="sidebar.left.top.color" description="Left Top Sidebar Background" type="color" default="#00f" value="#0000ff"/>
    <Variable name="sidebar.left.left.color" description="Left Left Sidebar Background" type="color" default="#ff0" value="#ffff00"/>
    <Variable name="sidebar.left.right.color" description="Left Right Sidebar Background" type="color" default="#f0f" value="#ff00ff"/>
    </Group>

    <Group description="Sidebar Column Background" selector="body">
    <Variable name="sidebar.bgr.color" description="Right Sidebar BG Color" type="color" default="#f00" value="#ff0000"/>
    <Variable name="sidebar.bgl.color" description="Left Sidebar BG Color" type="color" default="#f00" value="#ff0000"/>
    </Group>
  9. After that, find ]]></b:skin> and REPLACE it with the following code:
    #sidebar-right-1 { background: $(sidebar.right.top.color); }
    #sidebar-right-2-1 { background: $(sidebar.right.left.color); }
    #sidebar-right-2-2 { background: $(sidebar.right.right.color); }
    .column-right-inner, column-right-outer { background: $(sidebar.bgr.color); }
    .column-left-inner, column-left-outer { background: $(sidebar.bgl.color); }
    #sidebar-left-1 { background: $(sidebar.left.top.color); }
    #sidebar-left-2-1 { background: $(sidebar.left.left.color); }
    #sidebar-left-2-2 { background: $(sidebar.left.right.color); }
    ]]></b:skin>
  10. Click Save template and then Close button.
  11. Blogger Save Template Close Buttons

How to Change the Background Color in Template Designer?


We've finished the coding stuff, now simply click the Customize button to open Blogger Template Designer.
Blogger Customize Button
Then click the Advanced tab. You'll see 3 new options there. First one is Right Sidebar Background. It has 3 further options.


Right Top Sidebar Background: This will change the background color of the top section in the right column.
Right Left Sidebar Background: This will change the background color of the left sidebar in the right column.
Right Right Sidebar Background: This will change the background color of the right sidebar in the right column.


Next option is Left Sidebar Background. It also has 3 further options.


Left Top Sidebar Background: This will change the background color of the top section in the left column.
Left Left Sidebar Background: This will change the background color of the left sidebar in the left column.
Left Right Sidebar Background: This will change the background color of the right sidebar in the left column.


Last option will be Sidebar Column Background. This is the most interesting one because it affects the whole column rather than a single sidebar section. It has 2 further options.


Right Sidebar BG Color: The color in this option will change the background of whole column on the right side.
Left Sidebar BG Color: This option will change the background of left side column.

Saturday, March 5, 2011

Blogspot How to: Setup Blogger Custom Domain

How to Setup Blogger Custom Domain


By default, your blog address is in this format; http://YOURBLOG.blogspot.com/. As you can see, all blogs hosted on Blogger have blogspot.com included in their address. Such an address is difficult to remember and it is not suitable for a professional blog. Traditionally, switching to a personalized domain required research, a web hosting comparison and the purchase of relatively expensive hosting. Fortunately, Blogger has made arrangements for those who are looking for free or cheap hosting while also upgrading to a more personalized domain name. Now, you can simply buy a custom domain directly through Blogger and forget about setting it up. In this tutorial, I'll explain this whole process of searching, buying and setting up a custom domain.

What is a Custom Domain?


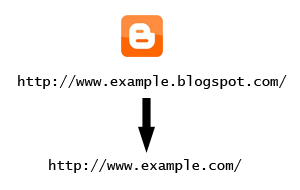
The domain of my blog is a custom domain; http://www.betatemplates.com/. It is a .com domain. However, when someone creates a blog on Blogger, the address of that blog is in this format; http://example.blogspot.com/. Blogger adds .blogspot to all of its blogs.

Why Should I Use a Custom Domain?


The Blogger addresses are very difficult to remember because they contain .blogspot. Switching to a custom domain makes it really easy to create an easy-to-remember address. It also gives a good impression to have a custom domain specially for professional blogs.

What is the Cost of a Custom Domain?


Typically, a custom domain costs you around 10$ per year. You have to renew it annually to keep using it. Please note that Blogger provides us free hosting so no need to buy hosting.

I'm Ready, Lets Buy & Setup a Custom Domain!


Follow these steps:
  1. Log in to your Blogger account.
  2. Go to 'Settings' then 'Publishing' tab.
  3. Click 'Switch to: Custom Domain' option.
  4. Enter the desired domain name and check its availability.
    If you're looking for a .com domain then it might be difficult to find a great domain because a lot of people chose .com domain names so good luck for that. You can also chose .net, .biz, .info or .org domains but they're not as popular as .com domains.
  5. If that domain is available, Blogger will take you to Google Apps and you'd have to complete 3 steps there. These steps are well explained in the following video:


How Long Will it Take to Shift to a Custom Domain?


After setting up a custom domain, it might take up to 3 days to move to the custom domain. So, don't worry about that. Blogger also takes care of the settings behind the scenes.

What Happens to Existing Address, Visitors & PageRank?


Here comes the awesome features of Blogger. Your existing visitors will be automatically redirected to the custom domain. The PageRank is also kept intact so don't worry about that as well.

Tuesday, February 8, 2011

Creating a Picture Link in Blogger Posts

Creating a Picture Link in Blogger Posts

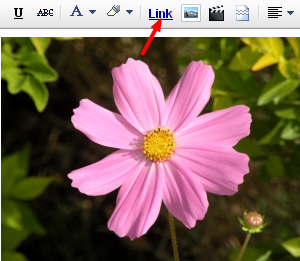
You can also create picture link so that when a user clicks an image in your post, a new blog or a website will open. By default, when you upload a picture, it is linked to itself. For example, I've uploaded the following image, click it to see what happens:


So by default this image is linked to itself. If you've clicked it, you would have seen that same image is opened in the same tab. So, we'll change this image link.

Creating an Image Link in New Post Editor


To change the image link, please switch to the 'Edit HTML' tab of your post editor.


You'll see that there is no image there. Instead, there will be only code. Actually, this code is the HTML of our image. 'Compose' mode shows us the compiled HTML and 'Edit HTML' mode shows the raw HTML code. Anyways, now we'll do a little bit of editing.

This is the code for the above uploaded image.

<div class="separator" style="clear: both; text-align: center;">
<a href="https://blogger.googleusercontent.com/img/b/R29vZ2xl/AVvXsEi1UB7H1LJcUnxbVkjxCBKDOj1SvNIzd6hqu4A_h0byVFRIuz-B31xEyBCVDVSx4DTOHWZXfKC4mfLnMeLX3B-7tj7dnmUKCyA1Z6JDOSkRPHZ22rGkU3UCw2Uenna5xz3qOJ0BuUeyjAHl/s1600/1330057_flower.jpg" imageanchor="1" style="margin-left:1em; margin-right:1em"><img border="0" height="225" width="300" src="https://blogger.googleusercontent.com/img/b/R29vZ2xl/AVvXsEi1UB7H1LJcUnxbVkjxCBKDOj1SvNIzd6hqu4A_h0byVFRIuz-B31xEyBCVDVSx4DTOHWZXfKC4mfLnMeLX3B-7tj7dnmUKCyA1Z6JDOSkRPHZ22rGkU3UCw2Uenna5xz3qOJ0BuUeyjAHl/s400/1330057_flower.jpg" /></a></div>


Please note that there will be 2 addresses or URLs in the uploaded image. For my image, these are the URLs.

https://blogger.googleusercontent.com/img/b/R29vZ2xl/AVvXsEi1UB7H1LJcUnxbVkjxCBKDOj1SvNIzd6hqu4A_h0byVFRIuz-B31xEyBCVDVSx4DTOHWZXfKC4mfLnMeLX3B-7tj7dnmUKCyA1Z6JDOSkRPHZ22rGkU3UCw2Uenna5xz3qOJ0BuUeyjAHl/s1600/1330057_flower.jpg


&

https://blogger.googleusercontent.com/img/b/R29vZ2xl/AVvXsEi1UB7H1LJcUnxbVkjxCBKDOj1SvNIzd6hqu4A_h0byVFRIuz-B31xEyBCVDVSx4DTOHWZXfKC4mfLnMeLX3B-7tj7dnmUKCyA1Z6JDOSkRPHZ22rGkU3UCw2Uenna5xz3qOJ0BuUeyjAHl/s400/1330057_flower.jpg


There is only 1 difference in the image URLs which is s1600 and s400. First URL with s1600 is actually the link URL. It is responsible for making this image a link. Second URL with s400 is the source URL. It displays the image.

As I've already told you that, by default, the image is linked to itself. So we need to change the first URL in our image code. For example, if I want to link the above uploaded image to my blog's homepage which is http://www.betatemplates.com/. I'll only replace my blog homepage URL with the first URL in the image code. After that, the image code will look something like this:

<div class="separator" style="clear: both; text-align: center;">
<a href="http://www.betatemplates.com/" imageanchor="1" style="margin-left:1em; margin-right:1em"><img border="0" height="225" width="300" src="https://blogger.googleusercontent.com/img/b/R29vZ2xl/AVvXsEi1UB7H1LJcUnxbVkjxCBKDOj1SvNIzd6hqu4A_h0byVFRIuz-B31xEyBCVDVSx4DTOHWZXfKC4mfLnMeLX3B-7tj7dnmUKCyA1Z6JDOSkRPHZ22rGkU3UCw2Uenna5xz3qOJ0BuUeyjAHl/s400/1330057_flower.jpg" /></a></div>

As you can see that I've only changed the first URL. Second URL is still an image. Now, if you'll click the following image, it will take you to my homepage.


Make Image Link Open in a New Window or Tab

If you're linking your image to some other blog or website then it is pretty desirable to make it open in a new window or tab. By doing this, visitors will stay on your blog.

To do this, I'll just add target="_blank" in the image code just after the link address. The code will look like this:

<div class="separator" style="clear: both; text-align: center;">
<a href="http://www.betatemplates.com/" target="_blank" imageanchor="1" style="margin-left:1em; margin-right:1em"><img border="0" height="225" width="300" src="https://blogger.googleusercontent.com/img/b/R29vZ2xl/AVvXsEi1UB7H1LJcUnxbVkjxCBKDOj1SvNIzd6hqu4A_h0byVFRIuz-B31xEyBCVDVSx4DTOHWZXfKC4mfLnMeLX3B-7tj7dnmUKCyA1Z6JDOSkRPHZ22rGkU3UCw2Uenna5xz3qOJ0BuUeyjAHl/s400/1330057_flower.jpg" /></a></div>


And the image will look same. However, now it will open in a new window or tab.

Sunday, February 6, 2011

How to Backup & Restore Blog Posts Using Blogger Import/Export Feature


Blogger has an awesome feature to download and save blog posts on your computer. Of course, you can later restore the posts as well. Additionally, you can also move your posts to some other blogging platform using the export feature or to some other Blogger blog. I'd highly recommend to regularly backup your posts. Check out the instructions to see how to do it.

1- Export or Backup Blog Posts to Your Computer


  1. Chose Settings from the list of options. You can press the drop down arrow button to see more options.
  2. In the Settings section, click Other from the left menu.
  3. You'll see 3 options in Blog Tools. Click Export blog. A window will open where you'd have to click the Download Blog button.
  4. An .XML file will be downloaded to your computer. Make sure to give it a proper name and keep it safe. This file will be used to restore your posts later.

2- Import or Restore Blog Posts From Your Computer


  1. Chose Settings from the list of options. You can press the drop down arrow button to see more options.
  2. In the Settings section, click Other from the left menu.
  3. You'll see 3 options in Blog Tools. Click Import blog. A window will open where you'd have to browse the file on your computer & click the Import Blog button.
  4. If you're importing posts from some other blog then make sure that Automatically publish all imported posts is not checked.
  5. Now your posts have been imported or restored.

How to Change Jump Break (Read More) Font, Color & Background Color in Blogger Template Designer


Blogger officially supports 'after the jump' summaries. You can insert a jump break anywhere in a post to make it short on the blog homepage. The part after the jump break will be visible only when user will click on the Jump Break or Read More link. In this tutorial, we'll add some coding in the template HTML. After that, you'd be able to change the font, color or even the background color of the Jump Break or Read More from the Template Designer.

Update!: This tutorial has been updated on 08/06-2012. Now, it can be applied to any default Blogger template without errors.

What is Jump Break or Read More Link?


If you don't know anything about Jump Break or Read More links, please read the following article in the official Blogger help.

Creating 'After the jump' summaries

Steps


Follow these simple steps to complete this Blogspot tutorial.
  1. Open the Template section.
  2. Blogger Updated Dashboard
  3. Click the Edit HTML button.
  4. Blogger Edit HTML Button
  5. A new window will open. You'd have to click the Proceed button to start editing.
  6. Blogger Proceed Button
  7. Scroll down a bit and you'll see this code:
    /* Variable definitions
    ====================
    Tip: Windows users can press 'Ctrl + f' to fing the code.
  8. Replace the above code with the following code:
    /* Variable definitions
    ====================

    <Group description="Read More" selector=".jump-link">
    <Variable name="readmore.font" description="Font" type="font"
    default="normal normal 12px Arial, Tahoma, Helvetica, FreeSans, sans-serif" value="normal normal 30px 'Courier New', Courier, FreeMono, monospace"/>
    <Variable name="rm.link.color" description="Link Color" type="color" default="#FFFFFF" value="#666666"/>
    <Variable name="rm.link.hover.color" description="Link Hover Color" type="color" default="#222222" value="#f5f5f5"/>
    </Group>

    <Group description="Read More Background" selector=".jump-link">
    <Variable name="rm.bg" description="Background Color" type="color" default="#00000" value="#222222"/>
    </Group>
  9. After that, find ]]></b:skin> and replace it with the following code:
    .jump-link { float: right; font: $(readmore.font); background: $(rm.bg); }
    .jump-link a, .jump-link a:visited { color: $(rm.link.color); }
    .jump-link a:hover { color: $(rm.link.hover.color); }
    ]]></b:skin>
  10. Now, save your template.
  11. After saving template, open the 'Template Designer'.
  12. In 'Template Designer', expand the Advanced tab and you'll see "Read More Link" tab at the top.


  13. You can change the font, color and background color and instantly see the preview. However, changes in hover link color will not be visible in the preview.
  14. After customizing the Jump Break or Read More link, click 'APPLY TO BLOG' link to save your changes.

Saturday, February 5, 2011

How to Add Unique Meta Tags For Each Post in Blogger

Meta description tags are vital for search engine optimization but adding unique meta tags for each post in Blogger is a tricky thing. I've tried my best to make this process as simple as possible.


Feel free to watch this video and many more videos on my YouTube channel. Make sure you also subscribe to get latest updates as well.

http://www.youtube.com/user/BloggerEngineer

Friday, February 4, 2011

Blogspot How To: Change Post Title Color in Blogger Template Designer Templates


I have received a lot of comments on a previous post. Readers are asking how to change the post title color in the new Blogger Template Designer templates. Well, here is a very simple step by step tutorial for you.We'll make some changes in the template CSS and then you'll be able to customize post title without any coding stuff.

Warning: Before making any changes, you must backup your existing layout:

Blogspot How to: Backup Your Blogger (Blogspot) Template

Steps to Make Post Title Font Customizable in the Blogger Template Designer Templates.


  1. Open the Template section.
  2. Blogger Updated Dashboard
  3. Click the Edit HTML button.
  4. Blogger Edit HTML Button
  5. A new window will open. You'd have to click the Proceed button to start editing.
  6. Blogger Proceed Button
  7. Find the following code:
    /* Variable definitions
    ====================
  8. REPLACE the above code with the following one:
    /* Variable definitions
    ====================

    <Group description="Post Title Color" selector="h3.post-title">
    <Variable name="post.title.link.color" description="Link Color" type="color" default="#ff0000" value="#ff0000"/>
    <Variable name="post.title.hover.color" description="Link Hover Color" type="color" default="#0000ff" value="#00ffff"/>
    <Variable name="post.title.color" description="Color on Post Page" type="color" default="#ff00ff" value="#ff00ff"/>
    </Group>

    Don't save or preview your template yet. Proceed to the next step.
  9. Now find this code:
    ]]></b:skin>
    and REPLACE it with the following one:
    h3.post-title { color:$(post.title.color); }
    h3.post-title a, h3.post-title a:visited { color:$(post.title.link.color); }
    h3.post-title a:hover { color:$(post.title.hover.color); }

    ]]></b:skin>
  10. Click the Preview button. You'll see the post title color as blue. Don't worry you can change it later in Blogger Template Designer. Save your template and click the Close button.

Hurray, Coding Done! Go & Customize the Post Title in Template Designer!


Simply click the Customize tab to open the Blogger Template Designer. Select Advanced from the left options. You'll see Post Title Color at the top.:


There are 3 options in the Post Title Color. Here is their detail:


Link Color: This is the color of the post title as a link. Any change to this option will appear in the Template Designer.


Link Hover Color: This color will appear when someone brings mouse over the post title. Any change to this option will not be visible in the Template Designer. You'd have to Apply the change, open the blog and bring your mouse over the post title to see the change in color.


Color on Post Page: This is the color of the post title on post page when post title is not a link. Again, you'd have to Apply the change and open some post title page to see the affect.


Help BetaTemplates!


If this tutorial was helpful then please add a link back to BetaTemplates on your blog. The link code is available at the bottom of this page.