Showing posts with label Header. Show all posts

Friday, June 19, 2009

How to Change Header Title Font, Size & Color

Intro!

This is a simple Blogger tut to tell you how to change the header title font. First of all, you should know which CSS code is responsible for your header title appearance:


#header h1 {
margin:5px 5px 0;
padding:15px 20px .25em;
line-height:1.2em;
text-transform:uppercase;
letter-spacing:.2em;
font: $pagetitlefont;
}


How to modify the style???


Now you know the CSS of your title. You can make modifications in it and see your results. Remember, these CSS changes will be visible only on main page because your header title behaves as a link in all other pages. First, let's customize it's appearance on main page.

----------------------------------------------------------------------------------
=> Add a 'font-family' Property!
----------------------------------------------------------------------------------

I want my header title to be in 'Arial' font, the code will be:

#header h1 {
margin:5px 5px 0;
padding:15px 20px .25em;
line-height:1.2em;
text-transform:uppercase;
letter-spacing:.2em;
font-family: arial, "lucida console", sans-serif;
}

Please note that I'm using 3 fonts (arial, "lucida console", sans-serif) in the above CSS. The reason is that if 'Arial' is not available on your visitor's pc then the font on 2nd position ("lucida console") will be used.

----------------------------------------------------------------------------------
=> Add Style Definitions for Header Title Font on Pages Other Than Main Page!
----------------------------------------------------------------------------------

As I told you before that your header title works as a hyperlink in all other pages of your blog other than the main page, so let's add some more CSS to customize the appearance on pages other than the main page.


#header h1 {
margin:5px 5px 0;
padding:15px 20px .25em;
line-height:1.2em;
text-transform:uppercase;
letter-spacing:.2em;
font: $pagetitlefont;
}

/* I've added a new tag which will change header title appearance on pages other than main page */

#header h1 a {
text-decoration:none; /* you can add 'underline' or 'overline' instead of 'none' */
color: #FFFFFF; /* you can add any color you want by changing 'FFFFFF' */
font-size: 25px; /* means title font size will be 25px on all pages other than the main page */
}

/* hover definitions will become alive when you bring mouse over title, this will also work on all pages other than main page */

#header h1 a:hover {
text-decoration:underline; /* title font will be underlined on mouse over */
color: #000000; /* title will become black on mouse over */
font-size: 10px; /* guess what will happen to font size on mouse over */
}

Good to Know!

I always try my best to share all the knowledge I've with you guys. You can always do experiments and share your results with me in comments. You should go to W3Schools.Org to read more about font properties.

Wednesday, June 10, 2009

How to Remove Header Borders in Minima Blogger Template

How to Remove Header Borders in Blogspot/Blogger

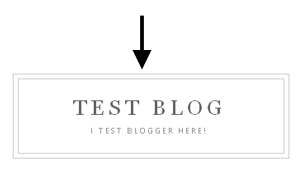
This is a really quick and easy trick. Whenever, someone creates a new blog, Blogger automatically chooses Minima Blogger Template by default. I really love this minimal template but the border lines around header doesn't make any sense. So, in this tutorial, Ill tell you how you can very easily remove the border lines around header.

Steps to Remove Borders Around Header/Title


1- Just go to Layout and then Edit HTML tab.

2- Find this code:

#header-wrapper {
width:660px;
margin:0 auto 10px;
border:1px solid $bordercolor;
}

#header-inner {
background-position: center;
margin-left: auto;
margin-right: auto;
}

#header {
margin: 5px;
border: 1px solid $bordercolor;
text-align: center;
color:$pagetitlecolor;
}


3- Delete the two lines from the above code which are border: 1px solid $bordercolor; and again border:1px solid $bordercolor;. After that, the code should look something like this:

#header-wrapper {
width:660px;
margin:0 auto 10px;
}

#header-inner {
background-position: center;
margin-left: auto;
margin-right: auto;
}

#header {
margin: 5px;
text-align: center;
color:$pagetitlecolor;
}


4- Preview your template and save if happy with the results.

Tuesday, March 10, 2009

Blogspot Tutorial: How to Add Adsense Ads Below Header

How to Add Adsense Ads Below Header in Blogger-Blogspot Blogs
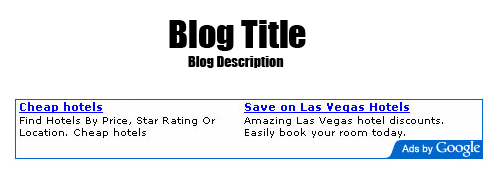
Inserting Adsense code in your Blogger-Blogspot header can be really beneficial. When a visitor comes to your site, he or she will definitely look at your header and then it's your turn to cash that first look. Just follow the steps below.

Lets Do Some Coding Work!


1- Go to Design and then Edit HTML tab.

2- Backup your current layout.

3- Don't check Expand Widget Templates.

4- Find the code given below. You can find it just after </head> tag:

<div id="header-wrapper">
<b:section class="header" id="header" maxwidgets="1" showaddelement="no">
<b:widget id="Header1" locked="false" title="Blogger FAQs(Header)" type="Header">
</b:widget>
</b:section></div>


The above code could be a little different but you'll definitely find a similar code in your template. If you're totally confused then feel free to ask for help.

6- In the above code change maxwidgets="1" to maxwidgets="2". Also change showaddelement="no" to showaddelement="yes" and save your template.

7- Now go to the Page Elements tab and there you'll see that you can add another widget in your header.

8- Insert your Adsense code there and make more money.

Wanna Support Beta Templates?


Beta Templates have been helping folks for a while now without asking anything in return. However, if you wanna help us then simply add our link anywhere in your blog. Instructions for adding link can be found at the bottom of this page.