Tuesday, February 8, 2011

Creating a Picture Link in Blogger Posts

Creating a Picture Link in Blogger Posts

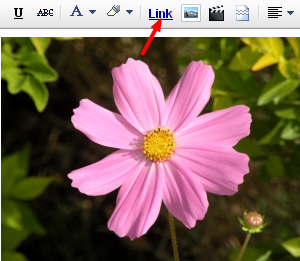
You can also create picture link so that when a user clicks an image in your post, a new blog or a website will open. By default, when you upload a picture, it is linked to itself. For example, I've uploaded the following image, click it to see what happens:


So by default this image is linked to itself. If you've clicked it, you would have seen that same image is opened in the same tab. So, we'll change this image link.

Creating an Image Link in New Post Editor


To change the image link, please switch to the 'Edit HTML' tab of your post editor.


You'll see that there is no image there. Instead, there will be only code. Actually, this code is the HTML of our image. 'Compose' mode shows us the compiled HTML and 'Edit HTML' mode shows the raw HTML code. Anyways, now we'll do a little bit of editing.

This is the code for the above uploaded image.

<div class="separator" style="clear: both; text-align: center;">
<a href="https://blogger.googleusercontent.com/img/b/R29vZ2xl/AVvXsEi1UB7H1LJcUnxbVkjxCBKDOj1SvNIzd6hqu4A_h0byVFRIuz-B31xEyBCVDVSx4DTOHWZXfKC4mfLnMeLX3B-7tj7dnmUKCyA1Z6JDOSkRPHZ22rGkU3UCw2Uenna5xz3qOJ0BuUeyjAHl/s1600/1330057_flower.jpg" imageanchor="1" style="margin-left:1em; margin-right:1em"><img border="0" height="225" width="300" src="https://blogger.googleusercontent.com/img/b/R29vZ2xl/AVvXsEi1UB7H1LJcUnxbVkjxCBKDOj1SvNIzd6hqu4A_h0byVFRIuz-B31xEyBCVDVSx4DTOHWZXfKC4mfLnMeLX3B-7tj7dnmUKCyA1Z6JDOSkRPHZ22rGkU3UCw2Uenna5xz3qOJ0BuUeyjAHl/s400/1330057_flower.jpg" /></a></div>


Please note that there will be 2 addresses or URLs in the uploaded image. For my image, these are the URLs.

https://blogger.googleusercontent.com/img/b/R29vZ2xl/AVvXsEi1UB7H1LJcUnxbVkjxCBKDOj1SvNIzd6hqu4A_h0byVFRIuz-B31xEyBCVDVSx4DTOHWZXfKC4mfLnMeLX3B-7tj7dnmUKCyA1Z6JDOSkRPHZ22rGkU3UCw2Uenna5xz3qOJ0BuUeyjAHl/s1600/1330057_flower.jpg


&

https://blogger.googleusercontent.com/img/b/R29vZ2xl/AVvXsEi1UB7H1LJcUnxbVkjxCBKDOj1SvNIzd6hqu4A_h0byVFRIuz-B31xEyBCVDVSx4DTOHWZXfKC4mfLnMeLX3B-7tj7dnmUKCyA1Z6JDOSkRPHZ22rGkU3UCw2Uenna5xz3qOJ0BuUeyjAHl/s400/1330057_flower.jpg


There is only 1 difference in the image URLs which is s1600 and s400. First URL with s1600 is actually the link URL. It is responsible for making this image a link. Second URL with s400 is the source URL. It displays the image.

As I've already told you that, by default, the image is linked to itself. So we need to change the first URL in our image code. For example, if I want to link the above uploaded image to my blog's homepage which is http://www.betatemplates.com/. I'll only replace my blog homepage URL with the first URL in the image code. After that, the image code will look something like this:

<div class="separator" style="clear: both; text-align: center;">
<a href="http://www.betatemplates.com/" imageanchor="1" style="margin-left:1em; margin-right:1em"><img border="0" height="225" width="300" src="https://blogger.googleusercontent.com/img/b/R29vZ2xl/AVvXsEi1UB7H1LJcUnxbVkjxCBKDOj1SvNIzd6hqu4A_h0byVFRIuz-B31xEyBCVDVSx4DTOHWZXfKC4mfLnMeLX3B-7tj7dnmUKCyA1Z6JDOSkRPHZ22rGkU3UCw2Uenna5xz3qOJ0BuUeyjAHl/s400/1330057_flower.jpg" /></a></div>

As you can see that I've only changed the first URL. Second URL is still an image. Now, if you'll click the following image, it will take you to my homepage.


Make Image Link Open in a New Window or Tab

If you're linking your image to some other blog or website then it is pretty desirable to make it open in a new window or tab. By doing this, visitors will stay on your blog.

To do this, I'll just add target="_blank" in the image code just after the link address. The code will look like this:

<div class="separator" style="clear: both; text-align: center;">
<a href="http://www.betatemplates.com/" target="_blank" imageanchor="1" style="margin-left:1em; margin-right:1em"><img border="0" height="225" width="300" src="https://blogger.googleusercontent.com/img/b/R29vZ2xl/AVvXsEi1UB7H1LJcUnxbVkjxCBKDOj1SvNIzd6hqu4A_h0byVFRIuz-B31xEyBCVDVSx4DTOHWZXfKC4mfLnMeLX3B-7tj7dnmUKCyA1Z6JDOSkRPHZ22rGkU3UCw2Uenna5xz3qOJ0BuUeyjAHl/s400/1330057_flower.jpg" /></a></div>


And the image will look same. However, now it will open in a new window or tab.
Sunday, February 6, 2011

How to Backup & Restore Blog Posts Using Blogger Import/Export Feature


Blogger has an awesome feature to download and save blog posts on your computer. Of course, you can later restore the posts as well. Additionally, you can also move your posts to some other blogging platform using the export feature or to some other Blogger blog. I'd highly recommend to regularly backup your posts. Check out the instructions to see how to do it.

1- Export or Backup Blog Posts to Your Computer


  1. Chose Settings from the list of options. You can press the drop down arrow button to see more options.
  2. In the Settings section, click Other from the left menu.
  3. You'll see 3 options in Blog Tools. Click Export blog. A window will open where you'd have to click the Download Blog button.
  4. An .XML file will be downloaded to your computer. Make sure to give it a proper name and keep it safe. This file will be used to restore your posts later.

2- Import or Restore Blog Posts From Your Computer


  1. Chose Settings from the list of options. You can press the drop down arrow button to see more options.
  2. In the Settings section, click Other from the left menu.
  3. You'll see 3 options in Blog Tools. Click Import blog. A window will open where you'd have to browse the file on your computer & click the Import Blog button.
  4. If you're importing posts from some other blog then make sure that Automatically publish all imported posts is not checked.
  5. Now your posts have been imported or restored.

How to Change Jump Break (Read More) Font, Color & Background Color in Blogger Template Designer


Blogger officially supports 'after the jump' summaries. You can insert a jump break anywhere in a post to make it short on the blog homepage. The part after the jump break will be visible only when user will click on the Jump Break or Read More link. In this tutorial, we'll add some coding in the template HTML. After that, you'd be able to change the font, color or even the background color of the Jump Break or Read More from the Template Designer.

Update!: This tutorial has been updated on 08/06-2012. Now, it can be applied to any default Blogger template without errors.

What is Jump Break or Read More Link?


If you don't know anything about Jump Break or Read More links, please read the following article in the official Blogger help.

Creating 'After the jump' summaries

Steps


Follow these simple steps to complete this Blogspot tutorial.
  1. Open the Template section.
  2. Blogger Updated Dashboard
  3. Click the Edit HTML button.
  4. Blogger Edit HTML Button
  5. A new window will open. You'd have to click the Proceed button to start editing.
  6. Blogger Proceed Button
  7. Scroll down a bit and you'll see this code:
    /* Variable definitions
    ====================
    Tip: Windows users can press 'Ctrl + f' to fing the code.
  8. Replace the above code with the following code:
    /* Variable definitions
    ====================

    <Group description="Read More" selector=".jump-link">
    <Variable name="readmore.font" description="Font" type="font"
    default="normal normal 12px Arial, Tahoma, Helvetica, FreeSans, sans-serif" value="normal normal 30px 'Courier New', Courier, FreeMono, monospace"/>
    <Variable name="rm.link.color" description="Link Color" type="color" default="#FFFFFF" value="#666666"/>
    <Variable name="rm.link.hover.color" description="Link Hover Color" type="color" default="#222222" value="#f5f5f5"/>
    </Group>

    <Group description="Read More Background" selector=".jump-link">
    <Variable name="rm.bg" description="Background Color" type="color" default="#00000" value="#222222"/>
    </Group>
  9. After that, find ]]></b:skin> and replace it with the following code:
    .jump-link { float: right; font: $(readmore.font); background: $(rm.bg); }
    .jump-link a, .jump-link a:visited { color: $(rm.link.color); }
    .jump-link a:hover { color: $(rm.link.hover.color); }
    ]]></b:skin>
  10. Now, save your template.
  11. After saving template, open the 'Template Designer'.
  12. In 'Template Designer', expand the Advanced tab and you'll see "Read More Link" tab at the top.


  13. You can change the font, color and background color and instantly see the preview. However, changes in hover link color will not be visible in the preview.
  14. After customizing the Jump Break or Read More link, click 'APPLY TO BLOG' link to save your changes.

Saturday, February 5, 2011

How to Add Unique Meta Tags For Each Post in Blogger

Meta description tags are vital for search engine optimization but adding unique meta tags for each post in Blogger is a tricky thing. I've tried my best to make this process as simple as possible.


Feel free to watch this video and many more videos on my YouTube channel. Make sure you also subscribe to get latest updates as well.

http://www.youtube.com/user/BloggerEngineer

Friday, February 4, 2011

Blogspot How To: Change Post Title Color in Blogger Template Designer Templates


I have received a lot of comments on a previous post. Readers are asking how to change the post title color in the new Blogger Template Designer templates. Well, here is a very simple step by step tutorial for you.We'll make some changes in the template CSS and then you'll be able to customize post title without any coding stuff.

Warning: Before making any changes, you must backup your existing layout:

Blogspot How to: Backup Your Blogger (Blogspot) Template

Steps to Make Post Title Font Customizable in the Blogger Template Designer Templates.


  1. Open the Template section.
  2. Blogger Updated Dashboard
  3. Click the Edit HTML button.
  4. Blogger Edit HTML Button
  5. A new window will open. You'd have to click the Proceed button to start editing.
  6. Blogger Proceed Button
  7. Find the following code:
    /* Variable definitions
    ====================
  8. REPLACE the above code with the following one:
    /* Variable definitions
    ====================

    <Group description="Post Title Color" selector="h3.post-title">
    <Variable name="post.title.link.color" description="Link Color" type="color" default="#ff0000" value="#ff0000"/>
    <Variable name="post.title.hover.color" description="Link Hover Color" type="color" default="#0000ff" value="#00ffff"/>
    <Variable name="post.title.color" description="Color on Post Page" type="color" default="#ff00ff" value="#ff00ff"/>
    </Group>

    Don't save or preview your template yet. Proceed to the next step.
  9. Now find this code:
    ]]></b:skin>
    and REPLACE it with the following one:
    h3.post-title { color:$(post.title.color); }
    h3.post-title a, h3.post-title a:visited { color:$(post.title.link.color); }
    h3.post-title a:hover { color:$(post.title.hover.color); }

    ]]></b:skin>
  10. Click the Preview button. You'll see the post title color as blue. Don't worry you can change it later in Blogger Template Designer. Save your template and click the Close button.

Hurray, Coding Done! Go & Customize the Post Title in Template Designer!


Simply click the Customize tab to open the Blogger Template Designer. Select Advanced from the left options. You'll see Post Title Color at the top.:


There are 3 options in the Post Title Color. Here is their detail:


Link Color: This is the color of the post title as a link. Any change to this option will appear in the Template Designer.


Link Hover Color: This color will appear when someone brings mouse over the post title. Any change to this option will not be visible in the Template Designer. You'd have to Apply the change, open the blog and bring your mouse over the post title to see the change in color.


Color on Post Page: This is the color of the post title on post page when post title is not a link. Again, you'd have to Apply the change and open some post title page to see the affect.


Help BetaTemplates!


If this tutorial was helpful then please add a link back to BetaTemplates on your blog. The link code is available at the bottom of this page.

Tuesday, February 1, 2011

Video Tutorial: How to Add Facebook Share or Recommend Button in a Blogger Blog

You can easily add a Facebook share/recommend button in sidebar or below posts. This button lets users share your blog content with their friends on Facebook.


You can watch more Blogger help videos by going to my YouTube channel:

http://www.youtube.com/user/BloggerEngineer

Please subscribe and give your feedback.